
Ever struggled with a stubborn shed door that just won’t close properly? You’re not alone! Upgrading to replacement shed doors can not only enhance your shed’s look but also improve its functionality. Let’s explore seven straightforward tips to make your installation process smooth and hassle-free.
Installing replacement shed doors doesn’t require professional expertise when you follow proven techniques and select appropriate materials. These seven installation tips will save you $200–$800 in labor costs while delivering professional-quality results that last for years.
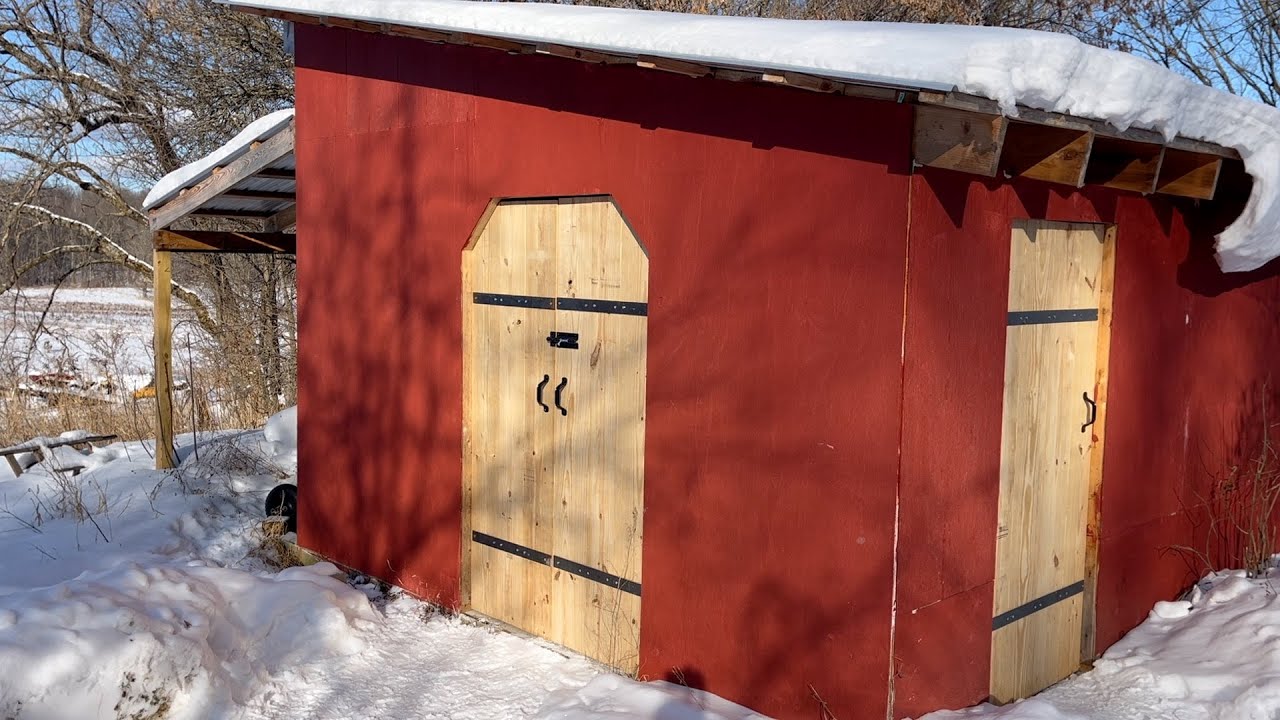
Select the Right Replacement Door Material
Choosing the correct door material impacts both upfront costs and long-term maintenance requirements. I’ll break down the most popular options to help you make an informed decision.
Material Options and Costs
Wood doors offer classic appeal but demand regular maintenance. Material costs range from $300–$650, with total installation averaging $530–$1,450. Steel doors provide enhanced security at $430–$1,650 installed, making them ideal for valuable storage areas.
Fiberglass doors excel in weather resistance with minimal upkeep, priced similarly at $430–$1,650. Vinyl variants offer budget-friendly solutions under $300, perfect for lightweight applications. Composite doors blend durability and aesthetics but command premium pricing.
Style and Feature Considerations
Panel styles should align with your shed’s architecture. Choose from flat, raised, or decorative options that complement the existing structure. Insulated doors are necessary for climate-controlled storage, reducing long-term energy costs.
Include windows for natural light using tempered glass models for durability. Hardware must be weather-resistant—stainless steel hinges and multi-point locks deter corrosion and intrusion effectively.
Precise Door Frame Measurement
Accurate measurements prevent costly mistakes and installation delays. I recommend measuring frame width at three points: top, middle, and bottom sections.
Record height measurements on both sides of the frame. Use the largest dimensions to accommodate any warping that may have occurred over time. Check for gaps exceeding 1/4″ since these will require weatherstripping adjustments later.
Double-check measurements with a carpenter’s square to verify right angles. Frame distortion can cause alignment issues that become apparent only after installation begins.
Safe Removal of the Old Door
Proper removal techniques protect both you and the door frame from damage. Start by unscrewing hinges using a power drill for efficiency. For rusted hardware, employ a screw extractor rather than forcing removal.
Support the door weight with an assistant to prevent frame damage during removal. This step prevents costly repairs to the shed structure. Inspect the frame thoroughly for rot or damage once the door is removed.
Replace compromised sections immediately using pressure-treated lumber ($2–$6 per linear foot). This investment prevents future structural problems that could affect door alignment.
Hinge Attachment Protocol
Optimal Hinge Specifications
Use three heavy-duty galvanized hinges positioned at the top, middle, and bottom of the door. Size hinges at one-third the door width plus 1″ per foot of height. For example, a 3’x6′ door requires 16″ hinges.
Secure hinges with 3″ stainless screws that penetrate the shed’s structural studs. This connection method provides the strength needed for years of reliable operation.
Mortise Preparation
Trace hinge outlines on the door edge for precise positioning. Chisel 1/8″-deep mortises for flush mounting that prevents binding during operation.
Pre-drill screw holes to prevent wood splitting, especially near edges where stress concentrates. This preparation step saves time during final assembly.

Heavy Duty 8FT Sliding Barn Door Kit
- Supports up to 300lbs for robust applications
- Wall mount track for double door setup
- Smooth sliding mechanism ensures quiet operation
- Ideal for exterior doors with wide openings
- Durable materials for long-term use
Efficient Door Hanging Strategy
Lift the door with assistance, carefully aligning hinges to the frame. Insert shims beneath the door for level positioning before securing any screws permanently.
Test swing clearance after initial positioning. Adjust hinge screws incrementally if binding occurs during the swing test. For sliding doors, install a track system rated for 300+ lbs to prevent sagging over time.
These heavy-duty hardware options provide reliable support for various door configurations:

10FT Heavy Duty Barn Door Hardware Kit
- Supports heavy doors with sturdy box rail
- Wall mount installation for wide compatibility

Arrow Shed Door Tune-Up Kit
- Enhances door functionality with fresh components
- Compatible with sliding Arrow sheds
- Includes essential parts for easy repairs
Lock and Hardware Installation
Position locks 40–48″ above the floor for ergonomic use by most adults. This height range accommodates comfortable operation without excessive bending or reaching.
For sheds storing valuables, integrate deadbolts or padlock-compatible hardware. Secure interior-mounted hardware with 2.5″ screws to deter tampering attempts.
Choose hardware finishes that match your climate conditions. Coastal areas require marine-grade options, while inland locations can use standard galvanized finishes.
Weatherproofing and Final Adjustments
Sealing Techniques
Apply UV-resistant silicone weatherstripping to the frame’s interior edges. Compress weatherstripping 30% when closed for optimal sealing without excessive resistance.
Install a twin-fin door sweep to block ground moisture effectively. Seal wood surfaces with exterior-grade stain or paint, re-coating every 2–3 years for maximum protection.
Functional Testing
Cycle the door 10–15 times, checking for consistent alignment throughout the range of motion. Tighten hinge screws if sagging exceeds 1/8″ during testing.
Verify latch engagement operates smoothly. Apply graphite lubricant to stiff mechanisms rather than oil-based products that attract dirt and debris.

COLORPAPA Sliding Shed Window Set
- Sliding function for easy ventilation
- Durable tempered glass ensures lasting clarity
- Fiberglass screen keeps insects out
- Seamless flush mount for clean look
- Great for sheds, coops, and small buildings
Cost Efficiency and Maintenance Tips
Cost-Saving Strategies
Labor constitutes 40–60% of total project expenses. DIY installation saves $200–$800 versus professional services when you follow proper techniques.
Choose fiberglass or vinyl doors in high-humidity regions to minimize rot-related repairs ($150–$300 per incident). For oversized doors (8+ feet), reinforce frames with steel brackets to avoid $600+ realignment costs.
Maintenance and Longevity
Inspect hinges bi-annually for corrosion signs. Replace with stainless models if pitting appears on the surface. Reapply sealant to weatherstripping every 18 months to maintain thermal efficiency.
Address minor rot immediately using epoxy consolidants ($10–$20/kit), preventing structural damage that requires expensive repairs. Regular maintenance extends door life significantly while preserving your investment.
For more shed improvement ideas, visit our comprehensive guide collection covering various outdoor storage solutions.
FAQs
What Are The Best Materials For Replacement Shed Doors?
The Best Materials For Replacement Shed Doors Include Wood For A Natural Look, Metal For Durability, And PVC Or Composite Materials For Low Maintenance And Weather Resistance.
How Do I Measure For Replacement Shed Doors?
To Measure For Replacement Shed Doors, Start By Measuring The Width And Height Of The Existing Door Opening. Then Measure The Thickness Of The Door, Noting Any Irregularities Or Variances. It’s Important To Take Multiple Measurements At Different Points To Ensure Accuracy.
Can I Replace The Doors On My Shed Myself?
Yes, Replacing Shed Doors Can Be A DIY Project If You Are Comfortable With Basic Tools And Have Some Experience With Home Improvement Projects. Make Sure To Follow Proper Safety Procedures And Double-Check Your Measurements Before Proceeding.
Where Can I Buy Replacement Shed Doors?
Replacement Shed Doors Can Be Purchased At Home Improvement Stores, Specialty Door Retailers, Or Online Marketplaces Such As Amazon Or Ebay. It’s Recommended To Compare Different Suppliers For Pricing And Reviews To Find The Best Option For Your Needs.
What Is The Average Cost Of Replacement Shed Doors?
The Average Cost Of Replacement Shed Doors Can Vary Greatly Depending On The Material, Size, And Design. Typically, You Can Expect To Pay Anywhere From $100 To $500 Per Door, Including Hardware And Installation Supplies.

Abdelbarie Elkhaddar
Glamorwood Ltd.
A door expert and home improvement writer with over 12 years of experience. I help homeowners and contractors choose smart, stylish, and secure doors.
Room Divider Doors: 5 Smart Designs to Maximize Space
Quick guide to five room divider doors that reclaim space and add privacy. Learn pros, simple install tips, and best styles for small rooms.Pocket Door Rollers: 5 Top Picks for Smooth Sliding
Five top pocket door rollers tested. Learn how to pick the right fit, measure your track, and follow a simple replacement plan for smooth, quiet doors.


Leave a Reply