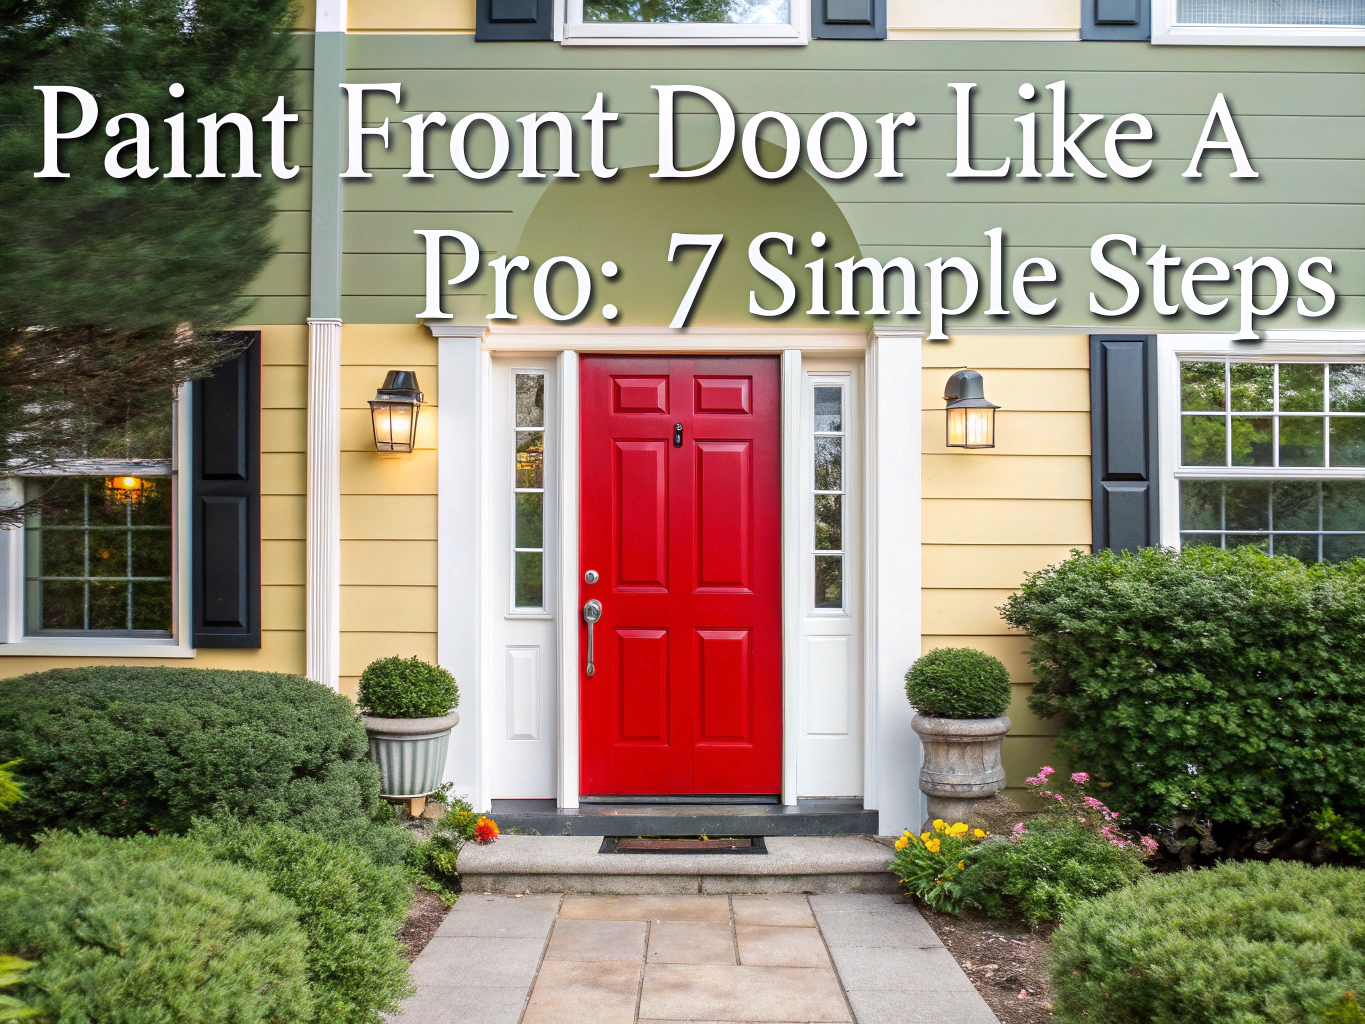
Ever thought about how a fresh coat of paint on your front door might transform the look of your home? A new color can add warmth and character, making your entrance inviting and stylish. Follow these simple steps to paint front door and create a stunning first impression.
Painting your front door can boost curb appeal and add significant value to your home with minimal investment. The right paint choice, proper preparation, and professional techniques will create a durable finish that withstands weather while making a lasting first impression.
Choosing the Best Paint for Your Front Door
Selecting the right paint is the foundation of any successful front door project. High-quality exterior paint specifically formulated for doors provides the durability needed to withstand UV rays, weather exposure, and frequent use. These specialized paints resist fading, peeling, and cracking better than standard wall paints.
Types of Exterior Door Paint
Water-based paints offer faster drying times and easier cleanup, making them ideal for DIY projects. Oil-based paints provide exceptional durability and create a harder finish that’s perfect for high-traffic doors. Both options work well on wood and metal surfaces when properly applied.
Satin and semi-gloss finishes are the optimal choices for front doors. These finishes resist dirt and moisture while being easy to clean. Semi-gloss provides a slightly more polished appearance, while satin offers a subtle sheen that hides minor imperfections.
Paint Coverage and Color Selection
One quart of paint typically covers a standard front door with enough left over for future touch-ups. Bold colors like classic black, deep red, or vibrant teal can increase your home’s value and create striking curb appeal. Studies show that a well-painted front door can yield up to 100% return on investment.
Recommended Paint Products
These top-rated door paints deliver professional results for DIY painters:

Rust-Oleum Satin Black Door Paint
- Fast-drying formula ensures quick application
- Satin finish offers elegant and subtle sheen
- Durable against weather and peeling
- Ideal for doors and trims
- Easy cleanup with soap and water

Modern Masters Elegant Door Paint
- Water-based formula for easy application
- Long-lasting fade-resistant color
- Provides a smooth, luxurious finish
- Suitable for exterior surfaces
- Quick-drying for faster project completion

Rust-Oleum Multi-Purpose White Paint
- Versatile use on multiple surfaces
- Offers excellent coverage with fewer coats
- Semi-gloss finish for a polished look
- Durable and weather-resistant
- Easy to apply with a brush
Essential Tools and Materials for a Professional Finish
Having the right tools makes the difference between an amateur and professional-looking result. Quality equipment saves time and produces smoother, more durable finishes that last for years.
Surface Preparation Tools
Proper preparation is 80% of the job. You’ll need these items to create the perfect painting surface:
- 120- to 220-grit sandpaper for smoothing between coats
- Degreasing cleaner to remove dirt and oils
- Clean rags and drop cloth for workspace protection
- Dust mask and safety glasses for protection
Painting Tools
Professional painters rely on specific brush types for different door areas. An angled brush works best for panels and detailed edges, while a small foam roller creates smooth coverage on flat sections. High-quality painter’s tape protects glass inserts and hardware, and a screwdriver helps remove handles and locks.
Primer and Additional Supplies
Primer creates the foundation for long-lasting paint adhesion. Use primer on bare wood, metal surfaces, or when making dramatic color changes. Water-based primers work well with water-based paints, while oil-based primers provide maximum adhesion for challenging surfaces.
Step 1: Remove or Protect Hardware and Door
Removing your door from its hinges allows for easier access and cleaner paint lines. This extra step prevents drips and makes it possible to paint all surfaces evenly without awkward angles.
Hardware Removal Process
Start by removing the door handle, deadbolt, and any decorative hardware. Take photos before disassembly to remember the correct reassembly order. Store screws and small parts in labeled containers to avoid losing them during the project.
If removing the door isn’t practical, you can paint it in place with careful preparation. This method works well for experienced painters who can maintain steady hands and avoid drips.
Protection Methods
Cover remaining hardware with high-quality painter’s tape for clean edges. Protect glass inserts and door frames with tape and plastic sheeting. Remove the tape while the paint is still slightly wet to prevent peeling.
Step 2: Clean, Sand, and Prime Your Door
Surface preparation determines how well your paint adheres and how long it lasts. Skipping these steps leads to premature peeling, bubbling, and an unprofessional appearance.
Surface Cleaning
Wash the entire door with a degreasing cleaner to remove accumulated dirt, oils, and grime. Pay special attention to areas around the handle where oils from hands build up over time. Allow the door to dry completely before proceeding to prevent adhesion problems.
Sanding Technique
Light sanding creates a paint-retentive surface that helps new paint bond properly. Focus on rough spots, peeling paint, and glossy areas that might resist new paint. Use 120-grit sandpaper for heavy work and 220-grit for final smoothing.
Remove all dust with a tack cloth or microfiber rag after sanding. Dust particles trapped under paint create a rough, unprofessional finish that’s difficult to correct later.
Primer Application
Apply primer to bare wood, metal surfaces, or areas where you’ve sanded down to the substrate. Quality primer prevents bleed-through and helps achieve uniform color coverage. Skip primer only if you’re painting over existing paint in good condition with a similar color.
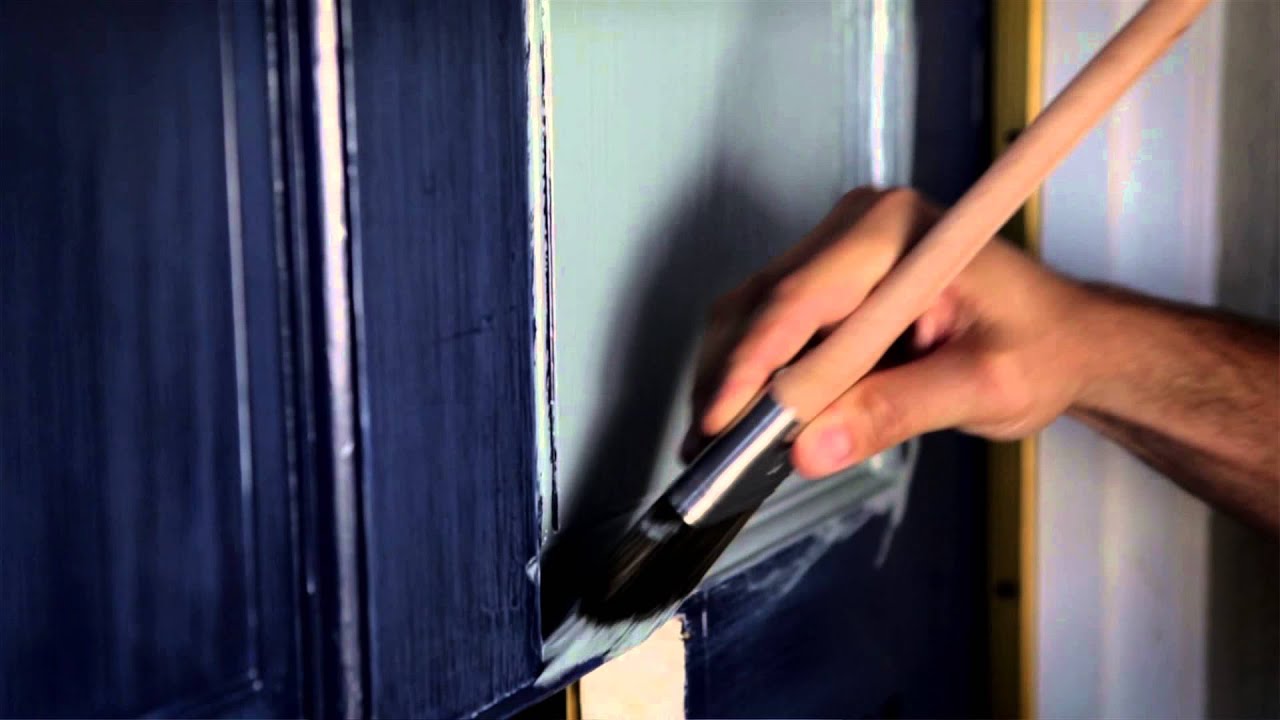
Step 3: Apply Paint Using Professional Techniques
Professional painting technique involves working in a specific order and using the right tools for each area. This systematic approach prevents lap marks and creates the smooth, even finish that distinguishes professional work.
Painting Order and Method
Start with panels, crevices, and beveled areas using an angled brush. These detailed areas require precision and are easier to paint before tackling large flat surfaces. Work from top to bottom to catch any drips before they dry.
Use a small foam roller for flat sections to achieve smooth, even coverage. Foam rollers eliminate brush marks and create a factory-like finish on flat door panels. Maintain a wet edge by working quickly and overlapping each stroke slightly.
Multiple Coat Application
Apply 2-3 thin coats rather than one thick coat for maximum durability. Thin coats dry more evenly and resist runs and sags. Allow each coat to dry according to manufacturer specifications, typically 30-60 minutes between coats.
Light sanding between coats with 220-grit sandpaper creates an ultra-smooth finish. This step is optional for most projects but makes a noticeable difference in the final appearance.
Edge Painting Guidelines
Paint the outer edge the same color as the exterior surface for visual consistency when viewed from outside. The hinge edge should match your interior color scheme since it’s visible when the door is open.

Specialty Finish Options and Color Trends
Beyond traditional solid colors, specialty finishes offer unique ways to upgrade your entrance. These options provide the look of expensive materials at a fraction of the cost.
Popular Color Choices for 2026
Classic black remains the most popular choice for its timeless appeal and versatility with any home style. Deep blues and rich reds create striking focal points, while bold colors like teal and chartreuse make dramatic statements that increase curb appeal.
Color psychology plays a role in home value, with certain colors consistently showing higher return on investment. Dark colors hide dirt better and create a sophisticated appearance that appeals to potential buyers.
Faux Wood Finish Alternatives
Faux wood grain kits transform metal or composite doors into realistic wood appearances. These complete systems include specialized tools and step-by-step instructions for creating authentic wood textures.

Giani English Oak Door Paint Kit
- Transforms doors with realistic wood grain finish
- Suitable for exterior and interior doors
- Simple DIY project with easy guidelines
- Water-based for safe indoor use
- Includes all tools needed for application

Giani Honey Oak Door Paint Kit
- Creates authentic wood-like appearance
- Perfect for both front and interior doors
- Quick and easy application process
- Water-based for minimal odor
- Complete kit with all necessary tools included

Giani Black Walnut Door Paint Kit
- Achieves rich wood look with ease
- Ideal for front and interior doors
- Easy-to-follow instructions for hassle-free application
- Low odor, water-based formula
- All-inclusive kit with tools provided

Giani Royal Mahogany Door Kit
- Provides rich mahogany wood appearance
- Suitable for both exterior and interior doors
- Straightforward DIY project
- Low VOC for safer indoor environment
- Comprehensive kit for easy transformation
Maintenance and Cost Considerations
Proper maintenance extends the life of your paint job and keeps your door looking fresh for years. Regular care prevents minor issues from becoming major problems that require complete repainting.
Long-Term Maintenance Tips
Clean your painted door with gentle, non-abrasive cleaners to maintain its appearance. Avoid power washing, which can force water into cracks and cause peeling. Address chips and scratches immediately to prevent moisture penetration and wood damage.
Plan to repaint every 3-5 years depending on climate exposure and paint quality. High-quality paints last longer and maintain their color better than budget alternatives. For more home improvement insights, check out our comprehensive guides on door maintenance and upgrades.
Time and Cost Estimates
A typical DIY front door painting project takes 4-8 hours total, including preparation and drying time. Material costs range from $50-$150 for paint, primer, and supplies. Professional painting services cost $200-$400+ per door, making DIY an attractive option for budget-conscious homeowners.
Factor in weather conditions when planning your project. Temperature and humidity affect drying times and can extend the project timeline if conditions aren’t optimal.
FAQs
What type of paint is best for front doors?
For front doors, it is best to use a high-quality, exterior acrylic latex paint. This type of paint offers excellent durability, weather resistance, and a wide range of color options. It’s also important to choose paint that provides good UV resistance to prevent fading.
How do I prepare my front door for painting?
To prepare your front door for painting, first clean it thoroughly to remove any dirt or grease. Then, sand the surface to smooth out any imperfections and remove the old paint. If there are any deep imperfections, fill them with a suitable wood filler and sand again. Finally, apply a primer to ensure the new paint adheres well and lasts longer.
Can I paint my front door without removing it?
Yes, you can paint your front door without removing it from its hinges. Use painter’s tape to protect the surrounding areas and hardware. It’s advisable to paint on a day with mild weather to allow the paint to dry evenly. Just make sure to keep the door open enough for the paint to dry properly.
Should I use a satin or gloss finish for a front door?
The choice between a satin or gloss finish depends on the look you want to achieve. A satin finish provides a subtle, elegant look with a soft sheen, whereas a gloss finish offers a shiny, reflective surface that can make bold colors stand out. Gloss is typically more durable and easier to clean but shows imperfections more easily.
How many coats of paint should I apply to my front door?
It is generally recommended to apply at least two coats of paint to your front door. The first coat acts as a base and may not cover completely, while the second coat provides a finished, uniform look. In some cases, particularly when changing colors drastically, a third coat may be necessary for optimal coverage.

Abdelbarie Elkhaddar
Glamorwood Ltd.
A door expert and home improvement writer with over 12 years of experience. I help homeowners and contractors choose smart, stylish, and secure doors.
Room Divider Doors: 5 Smart Designs to Maximize Space
Quick guide to five room divider doors that reclaim space and add privacy. Learn pros, simple install tips, and best styles for small rooms.Pocket Door Rollers: 5 Top Picks for Smooth Sliding
Five top pocket door rollers tested. Learn how to pick the right fit, measure your track, and follow a simple replacement plan for smooth, quiet doors.


Leave a Reply