

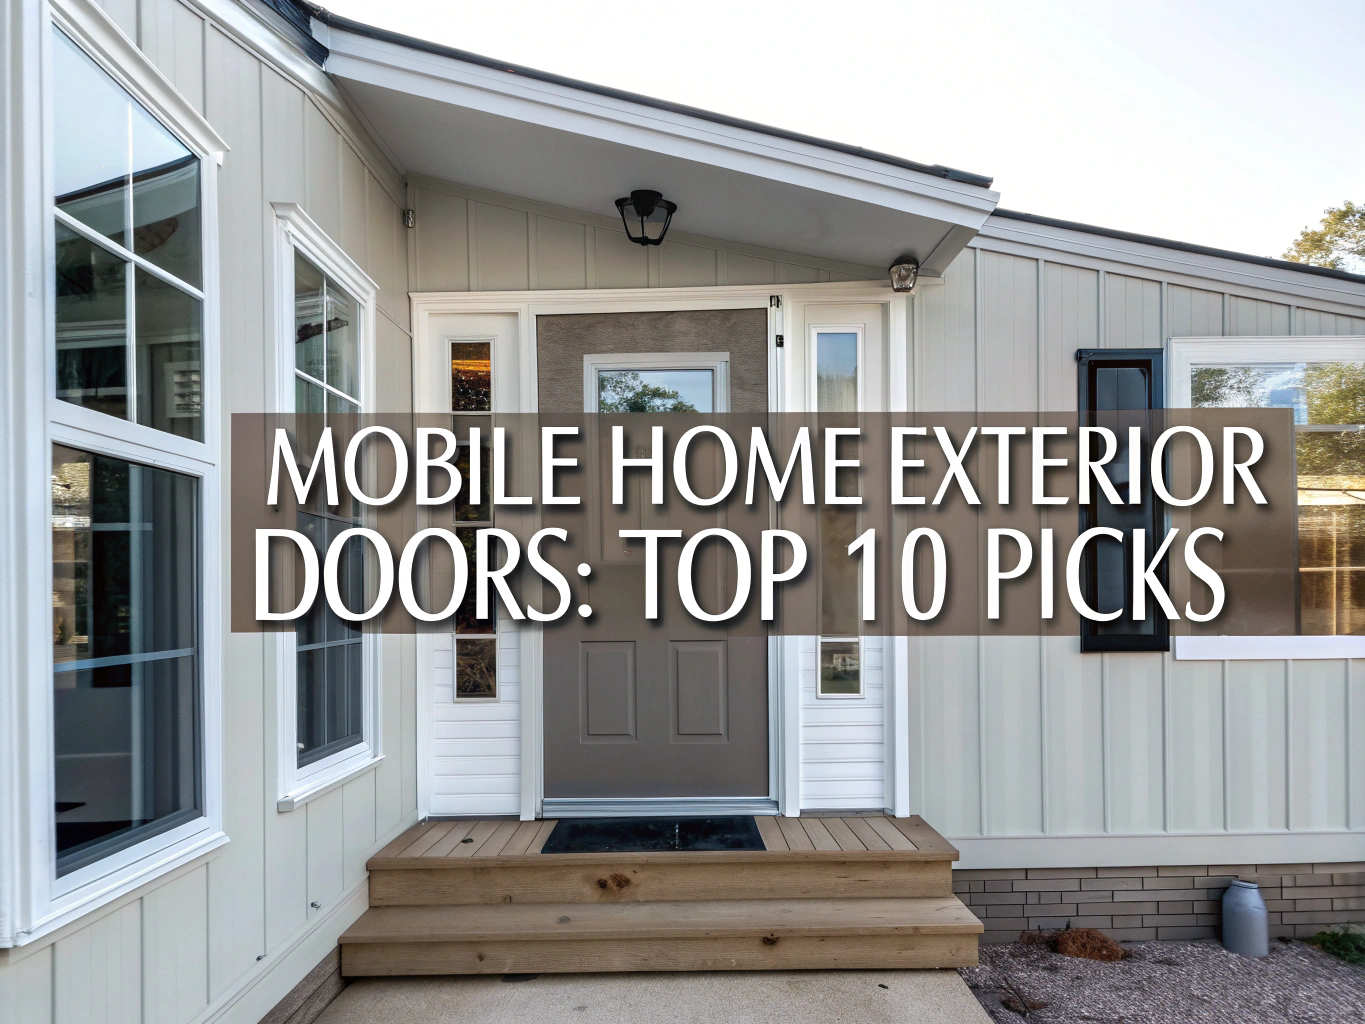
Mobile home exterior doors are commonly sold as prehung assemblies sized for manufactured-home openings. Match the opening dimensions, jamb depth, threshold, mounting style, swing, and handing before ordering—not just the old door slab.
This guide explains how to measure, compare doors for manufactured homes, check hardware, estimate project costs, install the unit, and diagnose leaks or binding.
Table of Contents
Choose the Right Mobile Home Door
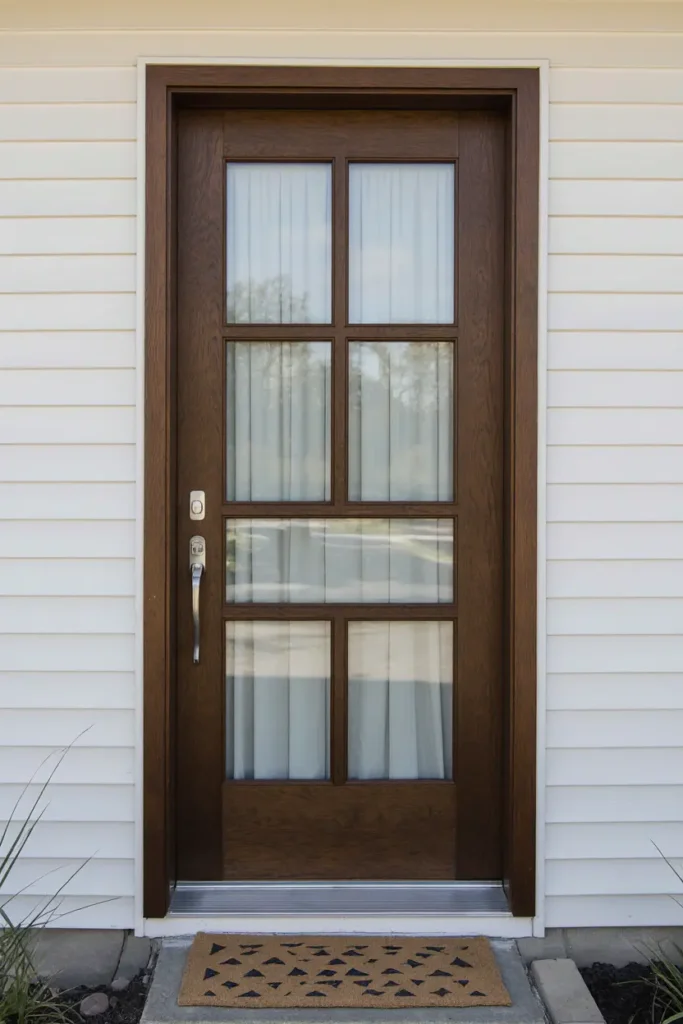
The right replacement matches the home’s opening and wall construction while providing the required security, weather resistance, and passage width. Most buyers get the safest fit from a manufactured-home prehung unit rather than an unrelated residential slab.
Prehung vs Door Slab
A prehung door includes the slab, hinges, jamb, and usually the threshold and weather seals. Factory alignment reduces hinge and latch work, but the complete frame still has to match the opening, wall depth, siding, and sill height.
A slab is only the moving door panel. Reuse the existing frame only if it’s sound, square, dry, and compatible with the new slab’s thickness, hinge positions, lock bore, backset, and perimeter seals; otherwise, trimming and hinge mortising can cost more than the apparent slab savings.
Primary vs Combination Doors
A primary door provides the insulated and secure barrier between the interior and outside. A combination door pairs that primary panel with an outer storm or screen assembly, adding ventilation and weather protection at the cost of more depth, moving hardware, and maintenance.
Check handle spacing before selecting a combination unit. Two handles that align at the same height can strike each other, while an exterior closer may hit trim, railings, or a shallow landing when the outer door opens.
Storm and Screen Doors
A storm door can shield the primary door and provide screened ventilation, but it can’t correct a leaking threshold or damaged frame. Measure the finished mounting opening and review this storm-door measuring guide before choosing the hinge side, closer, and handle location.
Strong afternoon sun can trap heat between a full-glass storm door and a dark primary door. Check both manufacturers’ exposure limits, particularly with fiberglass skins, vinyl trim, or decorative glass, and use a vented or interchangeable screen configuration where heat buildup is likely.
Glass and Panel Styles
Opaque six-panel doors provide privacy and reduce glare, while half-lite, fan-lite, and full-lite mobile home front doors admit daylight. Low-e insulated glass limits heat transfer, and textured glass obscures direct views without making an entry completely private after interior lights come on.
Glass in a door should carry a permanent safety-glazing mark where required. Decorative style comes after fit, clear passage, security, solar exposure, and compliance; ordinary window glass isn’t a safe substitute for rated door glazing.
Measure Mobile Home Exterior Doors
Measure a mobile home opening at several points, use the smallest width and height, check both diagonals, and record jamb depth and sill height. Seller conventions vary, so identify whether a listing states the slab, frame, or required rough opening.
Width and Height
Remove enough trim to see what you’re measuring. Record width at the top, middle, and bottom, then record height at the left, center, and right; a tape can feel tight or bow against rough framing, so keep it straight and use the smallest recorded dimensions for fit checks.
- Measure the existing slab for reference, but don’t order from that number alone.
- Measure the outside edges of the installed frame.
- Expose and measure the structural opening where practical.
- Record wall depth, sill height, mounting flange, and trim conditions.
- Photograph the opening from both sides with the tape visible.
- Write the hinge side and swing in plain language.
- Compare every number with the seller’s drawing and return policy.
Square and Diagonals
Measure corner to opposite corner in both directions. Equal diagonals indicate a square rectangle; a difference greater than about 1/4 inch across a small manufactured-home doorway deserves investigation because a new frame forced into a racked opening may rub or resist latching.
Diagonal measurements can look acceptable while the sill remains unlevel or a jamb bows inward. Check each side with a long level or straightedge, and repair settlement or soft framing before treating shims as a structural correction.
Dimension Types Compared
Door dimensions describe different parts of an assembly and aren’t interchangeable. A nominal 32-by-74-inch mobile home door may have different actual frame and rough-opening requirements from another seller’s product carrying the same advertised size.
| Dimension | What it measures | Why it matters |
|---|---|---|
| Slab size | The moving panel only | Useful for slab matching, hinge layout, and clear passage estimates |
| Outside-frame size | Outer edges of the jamb or unit frame | Shows whether the assembled unit can enter the opening |
| Rough opening | Structural opening before the new unit is installed | Allows room for positioning, shims, and specified clearances |
| Finished opening | Opening after trim or mounting surfaces are installed | Often used for storm-door ordering |
| Clear opening | Usable passage with the door open | Relevant to egress, moving furniture, and accessibility |
| Jamb depth | Distance across the wall from interior finish to exterior mounting plane | Controls trim fit and frame projection |
Common Door Sizes
Common listings include widths of 28, 30, 32, 34, and 36 inches, with heights of 72, 74, 76, 78, or 80 inches. These are market examples, not universal standards, and many older homes use short openings that won’t accept a conventional 80-inch unit without alteration.
| Advertised size | Typical shopping use | Checks before ordering |
|---|---|---|
| 30 × 74 inches | Narrow legacy entry or side door | Actual frame size, clear width, and handing |
| 32 × 74 inches | Common manufactured-home replacement listing | Rough opening, flange, threshold, and jamb depth |
| 34 × 76 inches | Wider or taller manufactured-home opening | Seller’s sizing convention and landing clearance |
| 36 × 80 inches | Residential-size or newer-home opening | Framing, wall depth, header, siding, and code requirements |
A page about a 32-by-80 exterior door can help compare residential proportions, but don’t infer compatibility from width alone. Four to six extra inches of height may involve a header, wiring, siding, interior finish, and landing changes.
Wall and Jamb Depth
Measure from the interior wall surface to the exterior mounting plane rather than assuming a residential jamb depth. A jamb that’s too shallow leaves exposed wall edges; one that’s too deep projects past the finish and can interfere with trim, a storm door, or the exterior flange.
Check whether the package includes a jamb, threshold, flange, brickmould, and interior casing. If parts must be assembled separately, an exterior door frame kit still has to match the slab, wall thickness, hinge geometry, and weather-seal system.
Threshold and Floor Height
Record the distance from the subfloor and finished flooring to the top of the existing sill. A replacement threshold that sits too high creates a trip edge and may catch the door sweep; one set too low can admit wind-driven rain or leave the flooring edge exposed.
Press firmly around the sill before removal. A soft, springy feeling underfoot, dark staining, a musty odor, or crumbling wood points to concealed water damage that must be repaired before the new door is fastened in place.
Swing and Handing
Record the viewing side, hinge side, and direction of travel because “left-hand” labels vary between sellers. Use unambiguous wording such as, “Viewed from outside, hinges left, door swings inward,” then confirm that description against the product diagram.
Inswing doors need interior clearance from furniture and flooring. Outswing doors need safe landing and railing clearance, and their hinges and weather details must be made for exterior exposure; never reverse a unit unless its instructions permit the new orientation.
Mounting and Siding
Identify whether the existing frame uses an integral screw flange or fasteners through a conventional jamb. Vinyl, aluminum, wood, fiber-cement, and metal-panel siding each require different removal and flashing methods, and thin siding can crease with a sharp metallic snap if it’s pried without support.
Plan how the new frame will connect to the wall’s drainage layer. Surface caulk may look clean for a season, but it can’t replace head flashing, sill drainage, and properly lapped side flashing behind the exterior finish.
Seller Size-Chart Checks
Before payment, compare the advertised size with the manufacturer’s drawing and ask what the numbers describe. Confirm the slab, outside frame, required opening, jamb depth, flange dimensions, threshold projection, clear passage, lock preparation, swing, handing, and return restrictions.
Oversized doors can carry expensive return freight, so save a dated copy of the specification page and written fit confirmation. A skilled workaround is to make a simple cardboard or thin-plywood template of uncertain flange and threshold details before committing to a special-order unit.
Compare Materials and Compatibility
Fiberglass resists rust, steel offers rigidity at a competitive cost, aluminum suits many storm-door parts, and wood provides a traditional finish with greater upkeep. Material matters, but frame compatibility and installation usually have a larger effect on leaks and operation.
Fiberglass Doors
Fiberglass exterior doors resist corrosion and need less finish care than wood. Quality varies in skin thickness, core, hinge blocking, and lock reinforcement, while dark finishes can become almost too hot to touch under direct summer sun and may face manufacturer restrictions.
Fiberglass works well in humid or coastal locations when hinges, screws, and lock components also resist corrosion. Inspect impact damage closely: a small surface crack can admit water into the edge or core and lead to skin separation.
Steel Doors
A steel exterior door offers good rigidity and security when the frame and strike reinforcement are sound. Scratches around the bottom edge, lock bore, or hinges can expose metal, and the first sign of corrosion often feels rough beneath otherwise smooth painted skin.
Touch up coating damage before rust spreads under the finish. Dents are harder to restore invisibly than surface marks, and persistent bottom-edge corrosion often traces back to a failed sweep, wet threshold, or blocked sill drainage path.
Aluminum Components
Aluminum commonly appears in storm doors, combination frames, screens, and trim. It’s light and corrosion-resistant compared with bare steel, but thin sections bend around closer brackets and hinges, so it shouldn’t be treated as equal to an insulated primary entry door.
Loose closer screws need more than larger screws driven into damaged metal. Use a manufacturer-approved reinforcement plate or compatible repair part; otherwise, repeated loads can elongate the holes and tear the aluminum frame.
Wood Doors
Wood provides a warm grain and can be refinished, but mobile-home-specific sizes are less common. Every face and edge needs a compatible coating, particularly the top and bottom, where unsealed end grain absorbs moisture and produces a swollen, dragging edge.
Choose wood where an overhang limits direct rain and routine refinishing is realistic. For an outer layer, compare purpose-built wood storm doors rather than adapting an interior panel that lacks exterior glue, glazing, and weather-rated joinery.
Residential Door Compatibility
A regular residential door can fit a mobile home, but it’s rarely a direct swap. The complete unit must match the structural opening, jamb depth, threshold, swing, siding, flashing plane, and landing; a conventional 80-inch frame may require opening alteration.
Enlarging an opening can disturb studs, a header, electrical wiring, interior panels, and exterior cladding. Get the wall and support design checked before cutting, since the lower door price can disappear once reframing, trim replacement, siding repair, and inspection are added to the job.
Energy and Climate Factors
For cold climates, prioritize an insulated core, continuous weatherstripping, low-e glazing, and a well-sealed threshold. Hot regions need attention to solar heat gain and dark finishes, while coastal sites benefit from corrosion-resistant hinges, fasteners, and lock hardware.
Compare U-factor and solar heat gain coefficient rather than relying on broad efficiency claims; the ENERGY STAR exterior doors guidance explains these ratings. Even a well-rated unit performs poorly when the jamb bows or foam pushes the frame away from the weather seals.
In wind-exposed areas, check approved fastening instructions and design-pressure data. A storm door shouldn’t be credited with large energy savings by default, and it may increase glass temperatures when installed over a sunlit primary door.
Compare Compatible Door Options
Product options should be compared by actual fit before appearance or price. Confirm the complete dimensions, construction, handing, swing, threshold, jamb, flange, lock preparation, freight terms, and opening requirements for each listing.
Product Compatibility Checks
A listing that says “made for mobile homes” isn’t universally compatible. Use the seller’s technical drawing to check at least the following fit variables before placing an order.
- Actual slab and outside-frame dimensions
- Required rough opening and installation clearance
- Wall or jamb depth
- Threshold height and projection
- Inswing or outswing operation
- Hinge side using the seller’s stated viewing position
- Integral flange, trim, and flashing arrangement
- Door thickness, lock bore, backset, and strike preparation
- Clear passage width
- Storm-door and handle clearance
- Freight damage process and return terms
Inspect a delivered unit while the carrier is present when possible. Look for a twisted frame, cracked fiberglass, bent flanges, broken glass seals, crushed corners, or a threshold that rocks; photograph the packaging and shipping damage before installation.
Half-Lite Left-Hand Inswing
This fiberglass half-lite option adds daylight and uses a left-hand inswing configuration. Verify the listing’s complete unit and rough-opening measurements, glass rating, exterior landing, and interior swing area rather than relying on the broad phrase “sized for many”.

Half-Lite Fiberglass Entry Door
- Sized for many mobile home entries
- Half-lite window adds natural light
- Fiberglass construction suits exterior use
- Left-hand inswing configuration
- Clean and practical front-door update
 Buy on Amazon
Mission-Style 32-by-74 Doors
These mission-style fiberglass options illustrate why size and handing must be selected together. Confirm whether 32 by 74 inches describes the slab, frame, or required opening, then choose the right-hand or left-hand inswing version that matches the site.

Mission Style Fiberglass Door
- Thirty-two by seventy-four inch size
- Mission styling creates a distinctive entry
- Fiberglass build for exterior use
- Right-hand inswing configuration
- Made for mobile home door openings
Buy on Amazon

Mission Style Fiberglass Door
- Thirty-two by seventy-four inch size
- Mission styling creates a distinctive entry
- Fiberglass build for exterior use
- Left-hand inswing configuration
- Made for mobile home door openings
Buy on Amazon
Six-Panel 30-by-74 Doors
Opaque six-panel fiberglass doors provide privacy and a traditional appearance in a narrow, short format. Style remains secondary to the rough opening, jamb depth, threshold, flange, lock preparation, weather seals, and correct inswing handing.

Six-Panel Fiberglass Entry Door
- Thirty by seventy-four inch door size
- Six-panel design gives a traditional look
- Fiberglass construction suits exterior use
- Right-hand inswing configuration
- Made for mobile home entry replacement
Buy on Amazon

Six-Panel Fiberglass Entry Door
- Thirty by seventy-four inch door size
- Six-panel design gives a traditional look
- Fiberglass construction suits exterior use
- Left-hand inswing configuration
- Made for mobile home entry replacement
Buy on Amazon
Storm Door Option
This white midview storm door is listed at 30 by 75 inches and balances glass area with privacy. Check the exact finished opening, hinge side, mounting face, closer travel, and handle spacing; it protects an entry but doesn’t replace a secure, insulated primary door.

Larson Midview Storm Door
- Thirty by seventy-five inch storm door
- Midview design balances light and privacy
- Adds a protective outer door layer
- White finish offers a classic look
- Designed for exterior entryways
Buy on Amazon
Check Mobile Home Door Hardware
Mobile home door hardware must match the door thickness, bore, backset, edge preparation, handing, and available clearance. Thin doors and close-set storm doors are the two common reasons an otherwise suitable lockset won’t fit.
Lockset Fit Requirements
Measure door thickness at the lock edge, bore diameter, latch edge-bore, backset from the edge to the bore center, and strike position. A residential lock made for a thicker door may remain loose after tightening or leave too little thread engagement on a thin mobile home door.
The following two-packs are marketed for thin manufactured-home doors, but check their stated thickness range and dimensions against the installed door. Don’t enlarge a bore until the reinforcement and warranty permit it, since a wandering hole saw can tear the skin and weaken the lock area.

Mobile Home Lock Set Two Pack
- Includes knobs and deadbolts for two doors
- Fits thin manufactured home doors
- Adjustable latch supports easier fitting
- Stainless steel construction
- Suitable for front back or side entries
Buy on Amazon

Satin Nickel Lock Set Two Pack
- Includes knob and deadbolt sets for two doors
- Fits thin mobile home exterior doors
- Reversible handing supports either swing direction
- Rust-resistant stainless steel construction
- Satin nickel finish refreshes entry hardware
Buy on Amazon
Smart-Lock Compatibility
A smart deadbolt needs a supported door-thickness range, matching bore and backset, enough interior assembly clearance, and space between the primary and storm doors. Check weather rating, battery access, app requirements, and a mechanical-key backup before choosing keyless entry.
More than 100 user codes describe access features, not physical compatibility. A professional workaround for borderline storm-door clearance is to model both interior and exterior lock projections with stacked cardboard before drilling, while keeping all dimensions within the lock manufacturer’s limits.
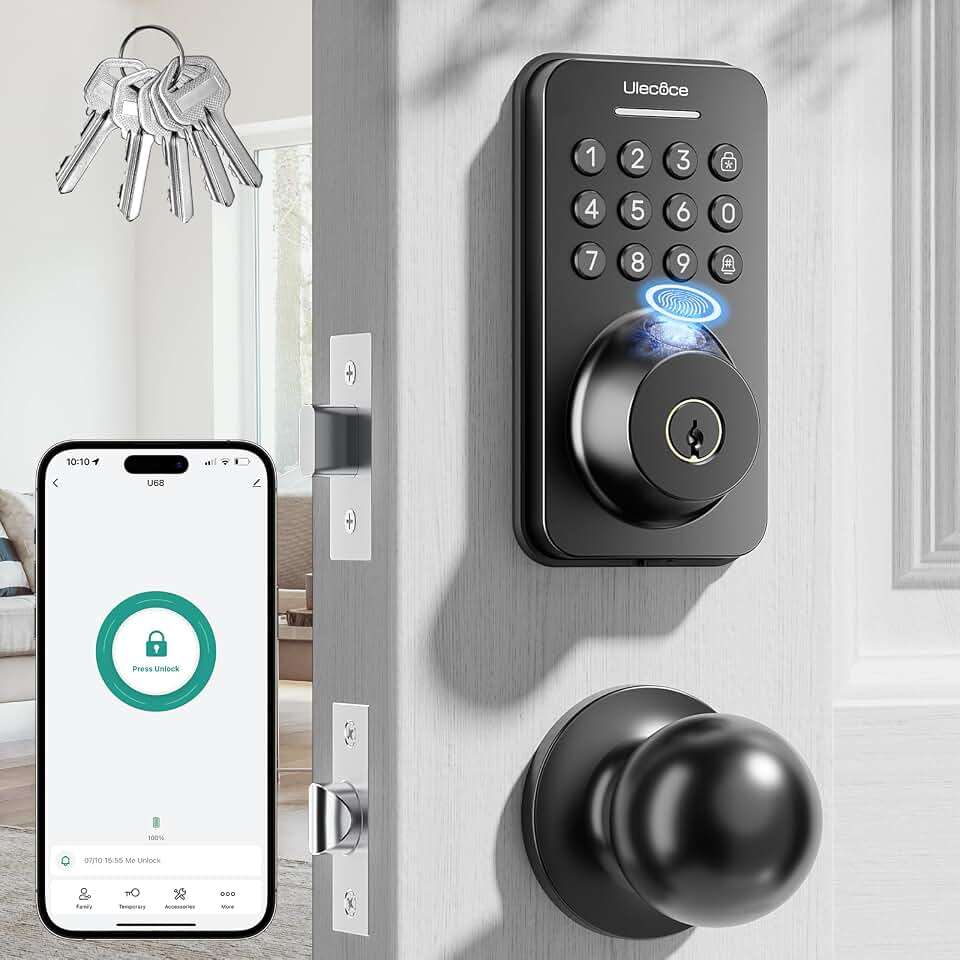
Fingerprint Keypad Deadbolt Set
- Fingerprint access offers keyless convenience
- Keypad supports more than one hundred user codes
- App control provides flexible entry management
- Auto-lock and one-touch lock functions
- Includes keys for backup access
Buy on Amazon
Replacement Hinge Compatibility
Replace hinges when pins wear, leaves bend, knuckles crack, screw holes strip, or the slab sags in a square frame. Match the brand, leaf size, hole pattern, pin diameter, offset, and load rating; combination-door hinges can be brand-specific parts.
These replacement hinges are described for Elixir combination doors and shouldn’t be treated as universal. If screw holes have enlarged, repair the substrate with an approved reinforcement method rather than relying on longer screws that might penetrate wiring or miss the structural backing.

Heavy-Duty Mobile Home Hinges
- Three replacement hinges in each pack
- Designed for combination door repairs
- Made for Elixir mobile home doors
- Zinc alloy construction adds durability
- Helps restore smooth door operation
Buy on Amazon
Estimate Replacement Door Costs
A mobile home exterior door replacement commonly combines a $350–$900 basic prehung unit with labor, freight, hardware, trim, flashing, and disposal. Decorative glass, combination assemblies, structural repairs, or opening alterations can push the total above $1,500.
Door Price Ranges
Use price ranges as planning figures because size, glass, finish, handing, and delivery change the final amount. Basic slabs or lightweight panels often run about $200–$500, prehung manufactured-home units $350–$900, decorative fiberglass doors $700–$1,500 or more, combination units $500–$1,200 or more, and storm doors about $250–$600.
A cheaper residential unit may become the expensive option if its height requires reframing. Compare the complete installed scope rather than the sticker price, particularly on short legacy openings and homes with thin walls or flange-mounted frames.
Labor and Installation
Straightforward professional replacement labor often falls near $200–$700. Costs rise when the crew must remove siding, rebuild trim, correct a racked opening, alter steps, relocate wiring, or return after concealed damage is found beneath the old threshold.
Request written quotes that separate removal, installation, flashing, insulation, trim, painting, hardware, and repairs. A one-line labor figure makes it difficult to compare bids or identify work excluded from the quoted scope.
Freight and Disposal
Large door assemblies may carry oversized-item freight, lift-gate, rural delivery, or appointment fees. Ask who handles concealed damage and whether packaging must be retained; disposal charges also vary when glass, metal, and treated materials require separate waste handling.
Hardware and Materials
Budget for a lockset, deadbolt, shims, approved screws, pan or sill flashing, flashing tape, compatible sealant, low-expansion insulation, interior casing, exterior trim, primer, and paint. Small materials often add $75–$300, while premium smart locks or custom trim increase the allowance.
Structural Repair Costs
Soft subfloor, damaged wall framing, corroded metal, settlement, and failed siding can add several hundred dollars or more. Don’t conceal wet material behind the new frame; trapped decay returns as odors, loose fasteners, leaks, and a binding door.
Total Project Worksheet
Use one worksheet for every quote so low product pricing doesn’t hide delivery or repair costs. Add a 10%–20% contingency where the existing sill feels soft or the opening shows visible movement.
| Cost item | Planning range | Your estimate |
|---|---|---|
| Door assembly | $350–$1,500+ | |
| Labor | $200–$700+ | |
| Freight and delivery | $0–$400+ | |
| Lock and hardware | $40–$350+ | |
| Flashing, sealant, shims, insulation | $50–$200 | |
| Trim and finish work | $75–$400+ | |
| Old-door disposal | $25–$150 | |
| Structural or floor repair | $0–$1,000+ | |
| Permit or inspection | Local fee | |
| Contingency | 10%–20% |
Install the Exterior Door
Install a mobile home exterior door only after repairing moisture damage and confirming the opening is level, plumb, square, and properly supported. Dry-fit first, then integrate the frame with the drainage layer before insulating and completing operation checks.
Pre-Installation Inspection
Inspect the threshold, subfloor, wall framing, siding, weather barrier, steps, and landing. Watch for softness, rust flakes, staining, mold odor, insect damage, loose supports, or an opening that changes shape when the old door moves; these signs point to work beyond replacement.
Confirm the new unit’s size and operation before removing the old door, particularly if the entry is the home’s main exit. Read the manufacturer’s fastening, flashing, sealant, and warranty instructions and protect the unit from scratches on a padded, flat surface.
Door and Frame Removal
Remove interior trim as needed, support the slab, and locate flange or jamb fasteners before cutting. Work slowly around thin metal or vinyl siding, protect the weather barrier, and check for concealed wiring where screws or saw blades may enter the wall cavity.
Once the frame is out, scrape away failed sealant without gouging the drainage surface. Keep a few photographs of the old flashing arrangement, but don’t copy it blindly if water marks show that the original detail failed.
Dry-Fitting the Unit
Set the unsealed unit into the opening and check all clearances before applying tape or sealant. Confirm that the flange lies flat, the threshold sits fully supported, trim can cover the gaps, and the slab can travel without striking flooring, railings, or the storm-door hardware.
A dry fit often exposes a high framing corner that tape measurements miss. Mark the frame position and shim locations, then remove the unit and correct the opening rather than twisting the new jamb to force alignment.
Level, Plumb, and Square
Start with a level, fully supported threshold, then plumb the hinge jamb and square the frame. Shim at hinges and locking points as directed, checking the reveal as fasteners are tightened; an even reveal should look like a consistent dark line around the door slab.
Don’t tighten one corner fully before checking the others. Fasteners can pull a flexible frame out of shape, producing a springy latch or scrape that wasn’t present during the dry fit; follow the unit instructions and use corrosion-resistant fasteners.
Flashing and Drainage
Connect the sill, side jambs, and head to the home’s drainage plane using compatible pan flashing, tape, butyl, sealant, or flange details specified for the assembly. Lap materials so water sheds outward and keep intended sill drainage paths open.
Caulk on exterior trim is a maintenance joint, not the only water barrier. A skilled installation leaves a path for incidental water to escape instead of sealing every lower edge and trapping moisture beneath the threshold.
Insulation and Air Sealing
Fill the frame-to-wall gap with door-rated low-expansion foam or another approved insulation. High-expansion foam can bow a light jamb inward, creating tight weatherstripping on one side and daylight on the other; apply small lifts and recheck door movement.
Seal air gaps without blocking weep paths or burying adjustment points. Follow the detailed sequence in this guide to install an exterior door, while giving the product-specific manual priority for flange and fastener placement.
Final Operation Checks
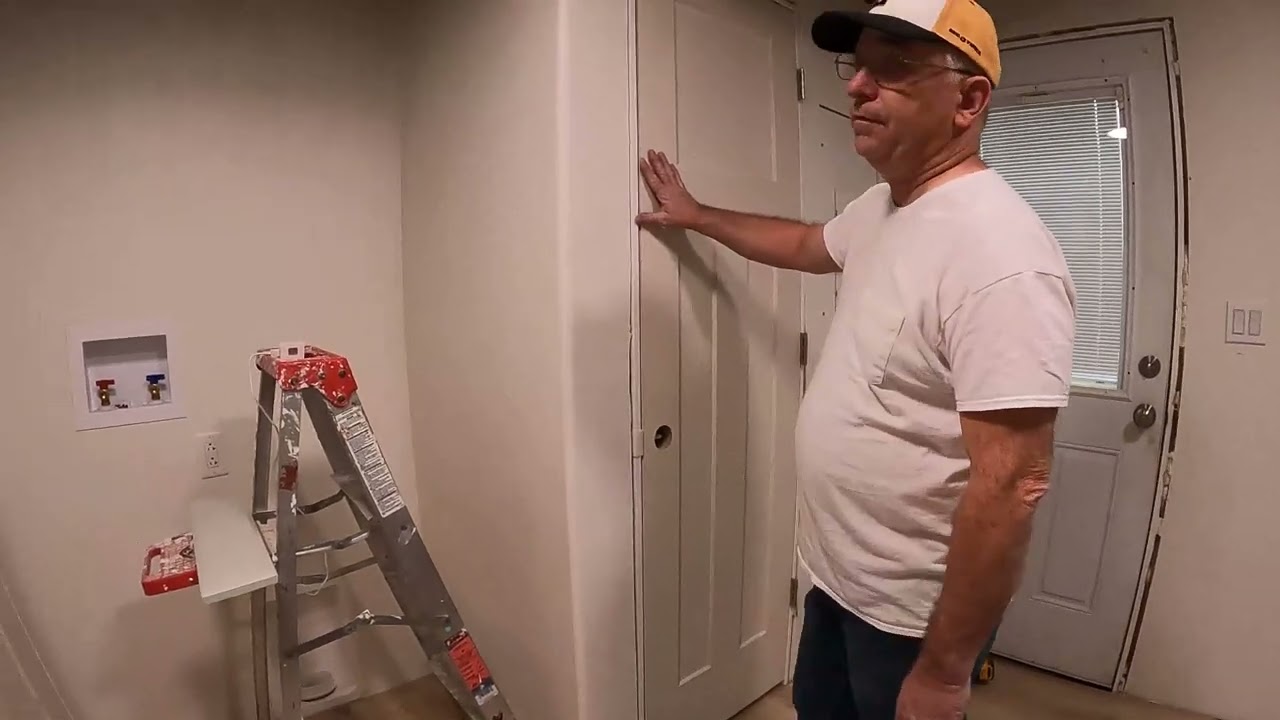
Open and close the door repeatedly before trim hides the fasteners. The latch and deadbolt should enter without lifting, pushing, or slamming; weatherstripping should contact evenly, and the sweep should brush the threshold without making a harsh scraping sound.
- Check the reveal with the door closed.
- Test the latch and deadbolt independently.
- Inspect weatherstrip contact with a flashlight from the opposite side.
- Pour controlled water above the sill only after exterior sealing is complete.
- Check storm-door handle and closer clearance.
- Confirm steps, landing, and threshold remain safe.
- Retighten hardware after the unit has settled according to its instructions.
Permits, Egress, and Glazing
Like-for-like replacement may face fewer reviews than enlarging or relocating an opening, but local rules can cover permits, landings, stairs, handrails, wind fastening, flood exposure, and fire separation. Manufactured homes built on or after June 15, 1976 fall within the federal HUD-code context described in 24 CFR Part 3280.
Don’t use nominal door width as proof of compliant egress; the open slab reduces the clear passage. Glass in or near doors may require permanently marked safety glazing, and opening alterations deserve review by the local authority and a qualified installer before framing is cut.
Diagnose Common Door Problems
Rubbing, latch failure, threshold leaks, drafts, rust, and delamination often come from frame movement or water entry rather than the slab alone. Diagnose the source before buying a new mobile home door, since replacement won’t correct settlement or rotten framing.
Repair vs Replacement
Repair is sensible when the frame stays square and dry and the problem is limited to weatherstripping, a sweep, strike adjustment, loose screws, or replaceable hinges. Choose a prehung replacement when the threshold is corroded, the jamb has deteriorated, the slab has failed, or parts can’t be matched safely.
Practical notes from real-world use: recurring defects matter more than a one-time adjustment. If the latch shifts again within weeks, the reveal changes after heavy rain, or the floor feels softer each season, inspect leveling, supports, drainage, and hidden framing before replacing hardware again.
Rubbing and Binding
Top-corner rubbing often points to hinge sag or a racked frame, while bottom rubbing may come from a swollen slab, high flooring, loose hinges, or an unlevel sill. Tighten compatible hinge screws and check the frame diagonals before planing or sanding the door edge.
A beginner’s common mistake is removing material from the slab before finding the cause. If settlement later gets corrected, the trimmed door may have a permanent air gap; mark contact points with painter’s tape and check home leveling and moisture before making irreversible cuts.
Latch Misalignment
A latch that needs a lifted handle usually indicates sagging hinges, loose jamb fasteners, or a racked opening. Small seasonal movement may permit strike adjustment, but repeated misalignment calls for inspection of the frame and the home’s support system.
Don’t file the strike opening wider until checking whether the deadbolt still enters freely and the weather seals compress evenly. An oversized strike can hide frame movement while reducing positive latch engagement and entry security.
Threshold Water Leaks
Water at the threshold may come from a failed sill seal, missing pan flashing, blocked drainage, worn sweep, incorrect door orientation, or roof runoff above the entry. Dry the area, trace staining upward and outward, and repair soft framing before installing another door assembly.
A hose test should start low and move upward in short stages with someone watching inside. Spraying the whole doorway at once can’t reveal the entry point, while excessive pressure can force water through details that don’t leak under normal rain exposure.
Perimeter Drafts
Drafts commonly result from worn weatherstripping, an uneven reveal, a bowed jamb, a poorly sealed frame gap, or a threshold set below the sweep. On a cold or windy day, a thin tissue held near the perimeter makes small air currents easy to see.
Replace compression seals with the correct profile rather than stacking generic foam. Added thickness can make the latch difficult, bend light frames, and prevent the slab from seating against the original weather barrier.
Rust and Delamination
Steel rust starts where coatings are scratched, fiberglass skins may crack or separate after impact or moisture entry, wood swells and rots, and aluminum bends around stressed fasteners. Probe suspicious lower edges gently and distinguish surface finish damage from a soft or failed core.
Sand and refinish minor steel corrosion only after stopping the water source; this guide to paint a metal front door covers finish preparation. Replace panels with extensive perforation, loose skins, damaged reinforcement, or unreliable lock support.
Settlement and Structural Movement
Changing diagonal gaps, recurring latch drift, wall cracks near the opening, or a threshold that falls out of level can indicate settlement or support movement. Replacing hinges won’t correct a moving opening, and forcing the new frame square may cause it to bind again after the home shifts.
Document diagonal measurements and reveal gaps over time, including weather conditions and recent leveling work. Have the home’s supports, drainage, and damaged framing assessed before repeated door adjustment; once movement is corrected, reset or replace the unit to restore stable operation.
FAQs
Disclosure: LuxyDoor is reader-supported. When you buy through links on our site, we may earn an affiliate commission at no extra cost to you. As an Amazon Associate we earn from qualifying purchases.

Abdelbarie Elkhaddar
Glamorwood Ltd.
A door expert and home improvement writer with over 12 years of experience. I help homeowners and contractors choose smart, stylish, and secure doors.
Bifold Barn Door Buying Guide: Sizes, Clearance, Hardware, and Tips
A bifold barn door can add barn-style character while saving space in closets, pantries, laundry rooms, bathrooms, and tight hallways. This guide explains how they work, how to measure correctly, what hardware you need, and what to check before buying.Modern Barn Door Buying Guide: Styles, Hardware, Sizing and Costs
Choosing a modern barn door means balancing style, privacy, hardware, sizing and installation needs. This guide compares materials, room fit, costs and product options so you can choose the right modern sliding barn door for your space.




Leave a Reply