

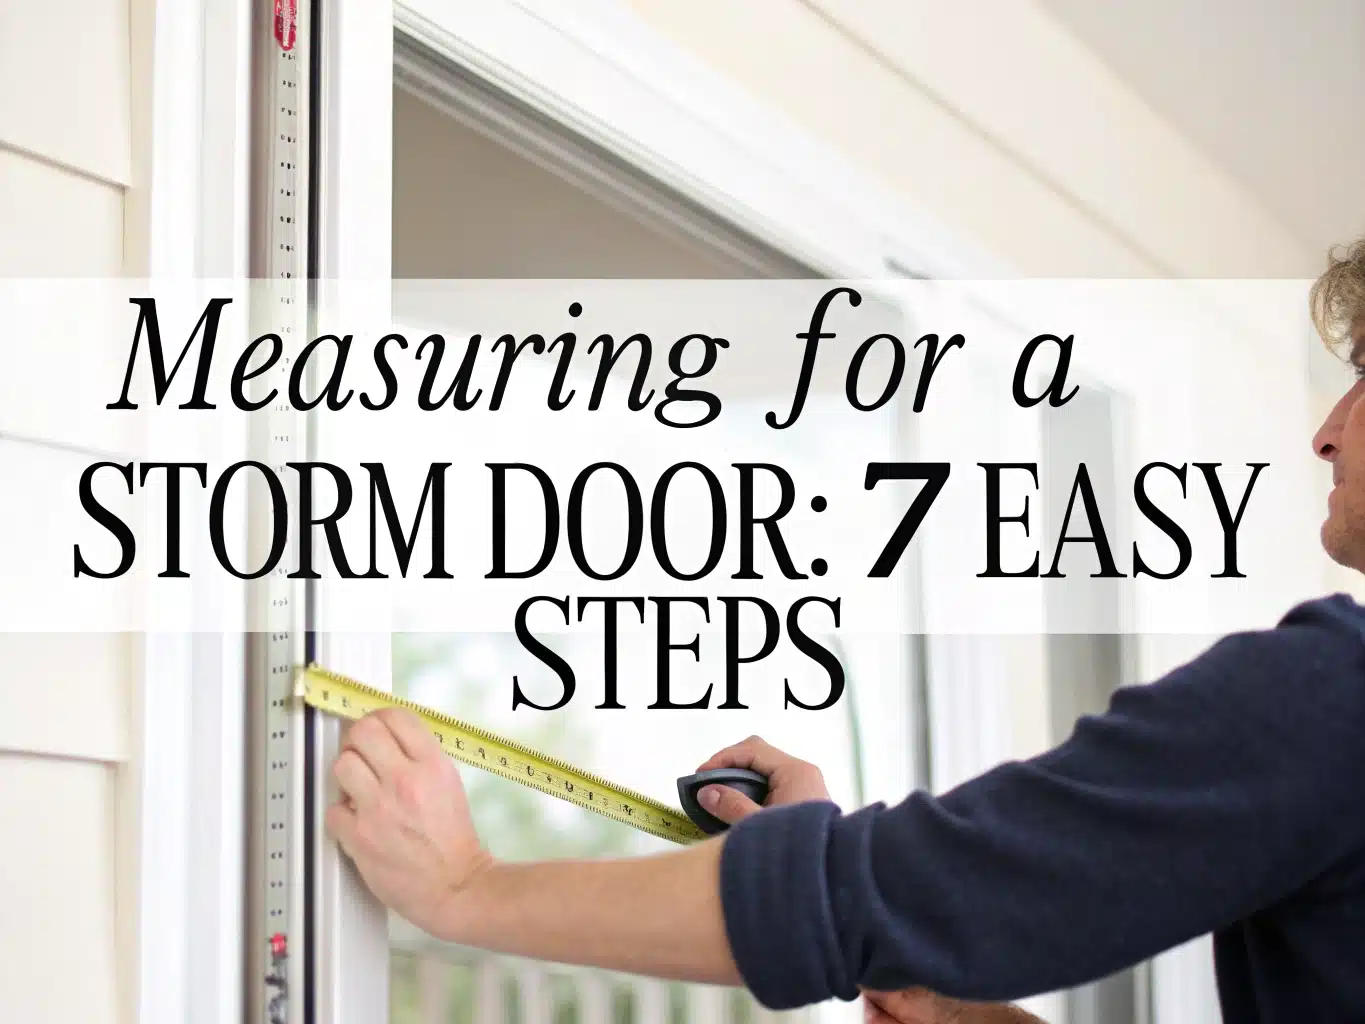
To measure for a storm door, measure the finished exterior mounting opening at three widths and three heights, then check mounting space and handle clearance. Record every reading and compare it with the selected model’s sizing chart—not the entry door slab’s dimensions.
Table of Contents
Prepare to Measure Your Storm Door Opening
Measure the opening that receives the frame, using the reference surfaces shown in the storm door manufacturer’s instructions. Before touching the tape, identify where the hinge rail, latch rail, and top rail will attach; those surfaces determine which measurements matter.
Tools and Manufacturer Instructions
Gather a retractable tape measure, pencil, worksheet, level, and phone camera. A framing square helps check corners. Keep the model’s measuring guide beside you: frame systems use different mounting details, so instructions for another door can send your tape to the wrong endpoints.
For Andersen or EMCO products, start with Andersen Storm Doors and locate the selected product’s sizing and installation documents. Save the model name and document revision with your measurements so the installer can check the same requirements.
The entry door slab is the moving panel, not the storm door mounting opening. A slab sold as 36 inches wide doesn’t establish the available space outside it. Open the entry door and inspect the exterior frame rather than measuring across the panel.
The rough opening is the structural opening behind the jamb and trim. It isn’t the normal measuring reference for a replacement storm door, and you shouldn’t remove sound trim just to expose it. If you’re replacing the entry assembly too, the sequence in our exterior door installation guide helps separate structural measurements from finished-frame measurements.
Brickmould and Rail Attachment Points
Brickmould is exterior trim around the entry door; its name doesn’t mean masonry brick. Identify the flat surfaces intended to receive the hinge rail, latch rail, and top rail or drip cap. Don’t assume decorative curves, narrow edges, or an existing storm door frame provide suitable measuring boundaries.
Check that the mounting trim is secure and sound enough to hold the specified fasteners. Flaking paint can hide soft wood, while a gritty, crumbling edge or visible movement signals a repair issue. Vinyl cladding and thin metal skins may need backing or specified fasteners; a screw gripping only a covering isn’t a reliable attachment.
Use the following endpoint diagram as an orientation aid, then move each endpoint to the exact surface identified in your model’s instructions. A face-mounted frame and an opening-mounted frame may use different references.
FRONT VIEW — EXTERIOR, NOT TO SCALE

           Exterior top trim / mounting surface
        ┌─────────────────────────────────────┐
        │ A ─────── width at top ──────── B    │
        │ │                │             │    │
 Left   │ │                │             │    │ Right
 mount  │ ├────── width at middle ────────┤    │ mount
 surface│ │                │             │    │ surface
        │ ├────── width at bottom ────────┤    │
        │ │                │             │    │
        │ C ─────────────── D ─────────── E    │
        └─────────────────────────────────────┘
              Specified sill landing surface

A–B: prescribed left and right width endpoints
A–C: left height    Center–D: center height
B–E: right height
Height starts at the prescribed upper reference.
Mounting-face width is measured separately.
Make a measurement worksheet before ordering. Photograph the full opening, both mounting faces, the top trim, threshold, entry handle, and nearby obstructions. Include one close-up showing the tape endpoints; a tight photo of the numbers alone doesn’t reveal whether you measured the correct surfaces.
| Measurement or check | Record |
|---|---|
| Width: top / middle / bottom | _____ / _____ / _____ inches |
| Height: left / center / right | _____ / _____ / _____ inches |
| Diagonal: upper left to lower right | _____ inches |
| Diagonal: upper right to lower left | _____ inches |
| Mounting-face width: left / right / top | _____ / _____ / _____ inches |
| Available mounting depth | _____ inches; location: _____ |
| Entry-handle projection and position | _____ inches; photo reference: _____ |
| Sill condition and swing obstructions | _____ |
| Manufacturer, model, and handing | _____ |
| Sizing document and revision | _____ |
Record actual fractions rather than rounding to a familiar door size. Reading to ⅛ inch is a practical starting point, but use finer readings if the instructions require them. If the tape lands between marks, recheck with better lighting instead of silently rounding down.
Measure the Storm Door Opening Width
Measure the storm door mounting opening horizontally at the top, middle, and bottom. Use the same left and right reference surfaces at each location, and keep all three readings rather than reducing them to one number.
Top, Middle, and Bottom Readings
- Measure near the top of the opening between the manufacturer’s specified boundaries.
- Repeat approximately halfway down, using those same boundaries.
- Measure near the bottom, above any sill feature that prevents a straight horizontal reading.
- Label each result immediately and repeat any reading that looks inconsistent.
Keep the tape straight and horizontal, without a diagonal angle or sag. Hook it against a firm endpoint rather than loose weatherstripping. Don’t measure across the outside edges of the trim if the instructions call for the opening between its inside edges.
A tape hook normally moves slightly to compensate for inside and outside measurements; that small click isn’t automatically a defect. A bent hook or loose rivets can still distort readings. For a questionable endpoint, use a known starting mark, such as 1 inch, then subtract that starting distance from the reading.
Record every width measurement, including identical results. If an old storm door remains installed, its rails may obscure the actual mounting opening. Check behind removable covers only as permitted, or arrange a measuring visit rather than ordering from the old door panel.
Uneven Width Example: ¼-Inch Variation
Suppose the top measures 35⅞ inches, the middle measures 36 inches, and the bottom measures 35¾ inches. The widest and narrowest readings differ by ¼ inch. That spread identifies a fit question; it doesn’t prove that a nominal 36-inch storm door will fit.
Don’t average the readings or order from the largest number. Many measuring guides use the narrowest width for an initial size check, but the chosen model’s instructions control the decision. A narrow spot can prevent frame placement, while a wider spot may exceed the permitted adjustment or leave an unsupported rail.
If one reading differs sharply, check for a paint ridge, bowed trim, or a misplaced tape endpoint before blaming the whole frame. Mark the narrow location in a photo. This gives an installer a specific problem to assess rather than an unexplained “about 36 inches.”
Measure the Storm Door Opening Height
Measure height vertically from the manufacturer’s specified upper reference to the sill surface used by the storm door’s bottom system. Record left, center, and right readings where accessible, while keeping any required manufacturer measurement locations.
Manufacturer-Specified Top and Sill References
Place the tape at the correct top surface—not automatically the underside of an existing drip cap. Extend it vertically to the prescribed sill landing. A rail, cap, or adapter from the old installation can change the apparent height, so document whether you’re measuring the finished opening or old hardware.
Take the left, center, and right readings without letting the tape bow. If the entry door or hardware blocks the center, open the door and reposition yourself rather than estimating. Label all readings by location so a low corner doesn’t disappear into a single height figure.
The porch floor isn’t the threshold. Measuring down to paving below the sill can make the opening appear taller than the storm door’s usable mounting space. On a stepped or sloped sill, identify the surface beneath the proposed sweep instead of choosing the lowest visible point.
Sloped Sills and Threshold Damage
A sill may slope outward to shed water, and its height can also vary from side to side. Record the surface where the bottom seal will operate. Look for loose threshold caps, raised screws, split wood, and soft spots; these can cause dragging or uneven sealing after the frame is installed.
Don’t add a block that traps water merely to create a convenient measuring surface. If the sill needs rebuilding, establish the repaired profile before ordering the door. An exterior door frame kit may be relevant to broader frame repairs, but its dimensions don’t replace the storm door’s mounting requirements.
The sweep and bottom expander seal the gap within their permitted adjustment range; they don’t correct an unlimited height mismatch. A sweep pressed too tightly against the sill can fold, scrape, and resist closing. Check adjustment limits before purchase, and never assume the door can be shortened.
Check Mounting Space and Operating Clearance
A storm door needs both secure mounting space and room to operate without striking the entry hardware or porch features. Correct width and height alone don’t establish compatibility.
Model-Specific Mounting Width and Depth
Measure the usable flat mounting face on both sides and across the top. Then measure the available depth in the locations shown by the installation drawing. Decorative ridges, screw-access restrictions, and narrow trim edges reduce usable space. There is no universal minimum that covers every frame system.
Compare diagonals from upper left to lower right and upper right to lower left, using consistent corners. Equal readings help indicate squareness, but they aren’t a complete check: a skewed opening can still have equal diagonals. Use a level and corner checks alongside width and height readings.
Check each side for plumb and the top for level. A bowed mounting face can also cause trouble between otherwise acceptable corners. Record the location of each deviation rather than applying a generic allowable difference; the model’s installation limits determine whether adjustment, repair, or a different product is needed.
Entry Handle and Closer Clearance
Check the entry handle’s projection, height, and horizontal position against the proposed storm door hardware. Two handles can collide with both doors closed or during movement. The closer bracket also needs a suitable attachment location and room for its travel, so use the hardware placement drawings, not just the door size chart.
This side-view diagram shows why opening width can’t reveal handle interference. Check opposing projections at their actual heights, then test the full operating paths; handles that miss each other when closed can still strike while a door moves.
SIDE VIEW — BOTH DOORS CLOSED, NOT TO SCALE

INTERIOR                                  EXTERIOR

Entry door          Space between doors       Storm door
    │                                               │
    │── entry handle →   ← storm-door handle ───────│
    │                                               │
    │_______________________________________________│
                    Sill / threshold

Compare:
• Distance between the closed door faces
• Projection of each opposing handle
• Handle heights and horizontal positions
• Movement paths and required clearance
Practical notes from use: a cardboard profile based on the manufacturer’s handle dimensions can expose a likely clash before purchase. Hold it at the proposed location and move the entry door slowly. This is a screening check, not a substitute for the required clearances or the supplied hardware template.
Inspect the outward swing for railings, walls, steps, lights, planters, and sloping paving. Check the space needed for comfortable entry, not just whether the panel can crack open. Photograph any obstacle near the swing path and flag it when requesting installation.
Confirm hinge handing using the manufacturer’s stated viewing convention. Some doors reverse during assembly; others have restrictions tied to handles, hinges, or factory preparation. Don’t assume “left hinge” means the same view in every listing, or that every model is reversible.
Use the video below as a visual companion to the written checks. Keep your selected model’s instructions nearby, since a demonstration doesn’t establish the mounting dimensions or adjustment limits for a different product.

Match Measurements to Storm Door Sizes
Select a storm door by comparing your complete worksheet with the specific model’s supported opening range. A nominal size is a purchasing label, not a guarantee that the frame fits your doorway.
Nominal Sizes Versus Product Dimensions
Keep three measurements separate: nominal size is the marketed size; product dimensions describe the supplied door or assembly; supported opening range describes the doorway it can accommodate. Using a panel dimension as an opening requirement can lead to ordering errors.
Common nominal widths include 30, 32, 34, and 36 inches, and an 80-inch nominal height is common. Availability varies by product line; consult sizing resources such as LARSON for the selected model. A label matching your entry door still doesn’t confirm fit.
For example, the dimensions discussed in our 32 × 80 exterior door guide describe an entry-door category. Your exterior mounting opening must be measured independently before choosing a storm door size.
Check the model’s width range, height range, mounting-face requirements, depth, hardware clearance, and handing together. A listing that shows only “36 × 80” doesn’t provide enough information. Ask for the actual sizing document before committing to delivery or installation.
Use Andersen, EMCO, and LARSON documentation for the exact product being ordered; don’t transfer one line’s tolerances to another. Save the chart with your worksheet and ask the seller to confirm any unclear boundary measurement. This is especially useful when a reading sits at a range limit.
Compatible Models and Custom Sizes
If no standard model fits, compare a compatible alternative frame system before ordering a custom door. For wood construction, check the measuring and finishing issues in our wood storm doors guide. Paired openings need separate planning; our double storm doors article addresses that different configuration.
A manufacturer-approved build-out may create the mounting face or depth a particular system needs. Confirm materials, fastening, and water-shedding details before work begins. Improvised shims behind unsupported rails can leave the assembly unstable or change the opening dimensions after the order is placed.
Repair loose or rotten trim before taking final ordering measurements. If the repair changes a mounting boundary, repeat all six readings and clearance checks. A custom door solves a size issue; it doesn’t solve weak attachment surfaces or hardware collisions.
Don’t cut the panel, frame, or mounting rails outside the exact model’s permitted installation steps. Instructions may allow cutting a rail or expander while prohibiting alteration of the door itself. Unauthorized changes can damage glazing or seals, weaken components, and affect warranty coverage.
Request a professional assessment if measurements fall outside the chart, trim hides questionable backing, the sill needs rebuilding, or no handle arrangement clears the entry door. Send the worksheet and photos before the visit so the assessment covers fit, fastening, and repair—not just nominal door size.
Understand Storm Door Installation Cost
Storm door installation cost can mean labor alone or the complete project, including the door and related work. Compare itemized quotes after measuring, because trim repairs, mounting changes, and custom sizing can change the scope.
Labor-Only Versus Complete Installed Cost
A labor-only quote normally assumes you’ll supply a compatible door and the opening is ready, but the written scope controls what is included. A complete installed quote should identify the door model, installation work, and any excluded repairs rather than giving one unexplained total.
Separate the door unit from the handle and hardware allowance. Some models include the handle set; others require a separate purchase. Ask whether the quote includes handle preparation, closer installation, weather seals, and any required mounting adapter.
Confirm removal, disposal, and delivery as separate line items or written inclusions. Removing an old frame can expose damaged trim that wasn’t visible during the first measurement. Agree on how the installer will document and price concealed damage before authorizing extra work.
Check applicable taxes, local permit requirements, travel charges, and service minimums. Don’t assume a permit is always needed—or never needed—because a simple replacement and a project involving structural frame changes can have different local rules.
Request separate pricing for trim repair, approved build-outs, sill repair, and custom sizing. Ask whether repaired openings require a second measuring visit and who owns the final ordering dimensions. This avoids paying for a custom unit that no longer fits after the frame work.
A standard-size door can cost more to install than expected when its opening needs repair. Correcting a bowed mounting face, replacing rotten brickmould, or resolving handle interference adds work without changing the nominal door label. Your worksheet helps expose these issues before the installer arrives.
Illustrative Budget Versus Verified Prices
For arithmetic only, a $300 door plus $200 labor and $50 for removal or minor extras totals $550. These figures are an illustrative budget—not a verified market average, a local quote, or a stated price for 2026—and they assume no separately charged hardware, repairs, delivery, or taxes.
Obtain dated local quotes using the same model and worksheet. Ask each provider to state location, labor scope, included hardware, removal, disposal, repairs, delivery, taxes, and exclusions. A lower total isn’t directly comparable if another quote includes trim replacement or a return visit.
Before ordering, confirm three things in writing: the selected model accepts your recorded opening, its mounting and operating requirements are met, and the installation quote covers the agreed work. That turns measuring from a size guess into a documented fit check.
FAQs
Disclosure: LuxyDoor is reader-supported. When you buy through links on our site, we may earn an affiliate commission at no extra cost to you. As an Amazon Associate we earn from qualifying purchases.

Abdelbarie Elkhaddar
Glamorwood Ltd.
A door expert and home improvement writer with over 12 years of experience. I help homeowners and contractors choose smart, stylish, and secure doors.
Bifold Barn Door Buying Guide: Sizes, Clearance, Hardware, and Tips
A bifold barn door can add barn-style character while saving space in closets, pantries, laundry rooms, bathrooms, and tight hallways. This guide explains how they work, how to measure correctly, what hardware you need, and what to check before buying.Modern Barn Door Buying Guide: Styles, Hardware, Sizing and Costs
Choosing a modern barn door means balancing style, privacy, hardware, sizing and installation needs. This guide compares materials, room fit, costs and product options so you can choose the right modern sliding barn door for your space.




 Buy on Amazon

Leave a Reply