

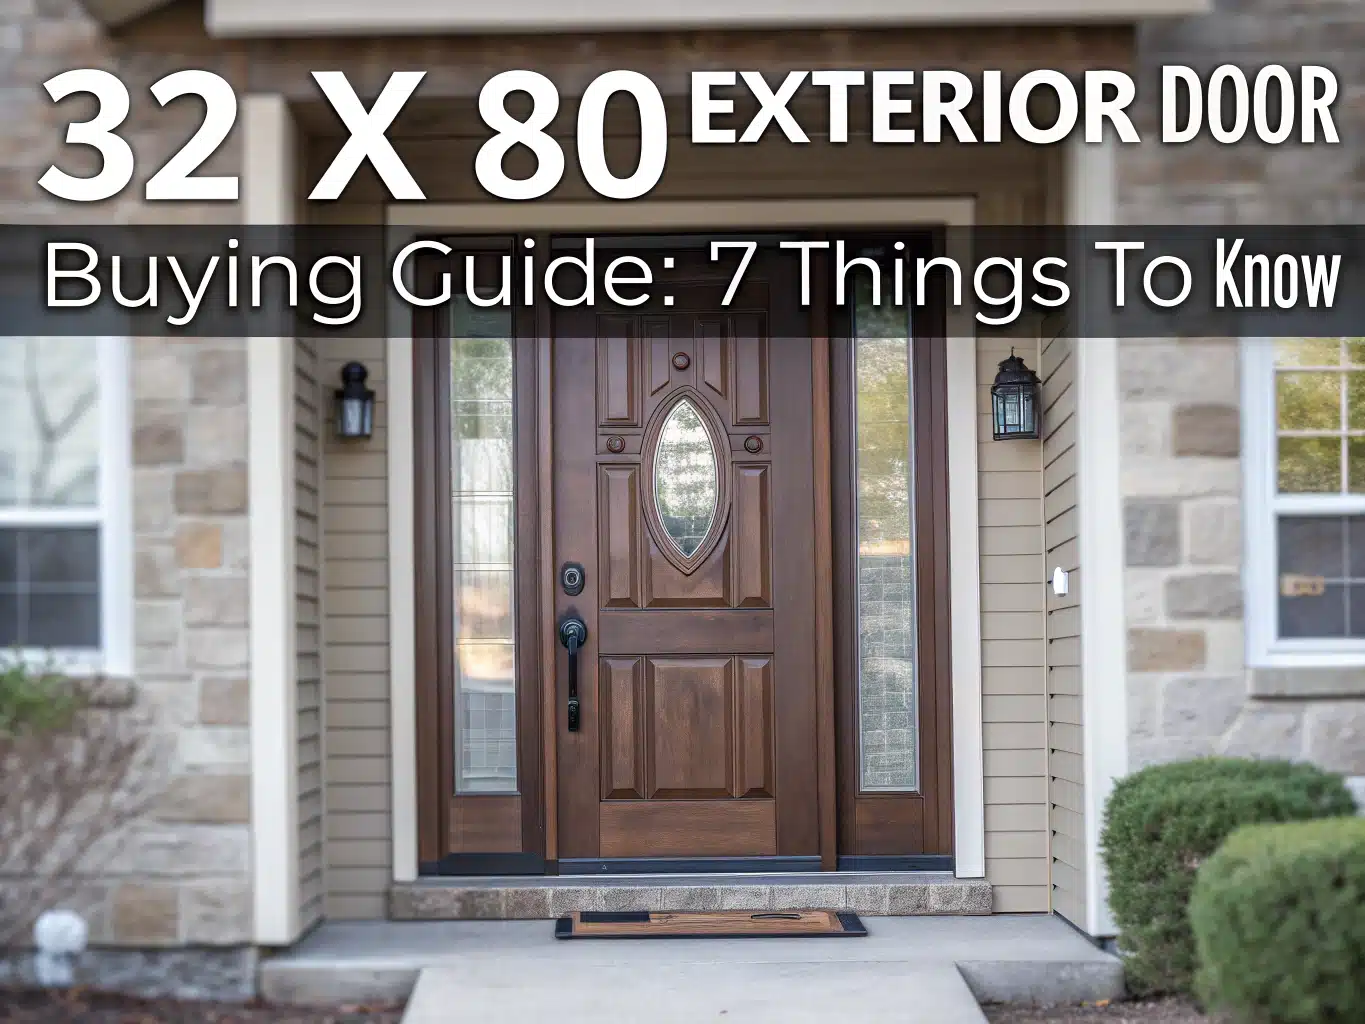
A 32 x 80 exterior door usually describes a nominal door size, not its exact slab dimensions or required framed opening. Before ordering, match the actual measurements, assembly type, swing, hardware preparation, and local code requirements to your entry.
Table of Contents
32 x 80 Exterior Door Dimensions and Measurements
A 32 x 80 door isn’t guaranteed to measure exactly 32 inches wide by 80 inches tall. Its slab, frame, exterior trim, and rough opening have separate dimensions, and each controls a different part of the fit.
Nominal Size Versus Actual Dimensions
Nominal size identifies the product category; actual size describes the physical panel. For example, one supplied listing below states a slab size of 31¾ x 79 inches. That measurement belongs to that listing—it isn’t a standard deduction you can apply to every 32-inch exterior door.
Slab Thickness and Metric Dimensions: The nominal 32 x 80 dimensions convert to 812.8 x 2,032 mm, usually rounded to 813 x 2,032 mm. Many residential exterior slabs are 1¾ inches thick, or 44.45 mm, but check the product specification; thickness affects hinge alignment, lock compatibility, and contact with the weather seals.
Frame, Brickmould, and Rough Opening: The frame surrounds the slab, while brickmould covers the exterior joint around the frame. The rough opening is the structural opening behind the finish materials. Measuring between brickmould edges doesn’t tell you the rough-opening width.
Manufacturer Requirements Versus Planning Estimates: About 34 x 82½ inches is a planning estimate sometimes used for certain 32 x 80 prehung units, not an ordering specification. Frame profiles, thresholds, and installation clearances vary; use the exact unit’s dimensional sheet and Therma-Tru installation instructions or the relevant manufacturer’s equivalent.
Slab Width and Height Checks: Measure the existing panel across the top, middle, and bottom, then measure height near both edges. Record the thickness too. Don’t average away a discrepancy: different readings may reveal a tapered slab, swelling, wear, or an opening problem that a new panel won’t fix.
Opening Square, Plumb, and Level: Compare both opening diagonals, check each jamb with a level, and check the sill across its width. Equal diagonals alone don’t prove the opening is plumb. A frame can be square yet lean, causing the door to drift open or closed.
Jamb Depth and Floor Clearance: Measure the wall thickness the jamb must span, following the manufacturer’s stated reference surfaces. Check the finished floor, rugs, and sweep through the entire swing arc. A door that clears bare subfloor may scrape once tile, an underlayment, or an entry mat is added.
Four-Measurement Diagram and Ordering Worksheet
The four-measurement diagram below separates the boundaries buyers often confuse. It shows their relationship, not a scale drawing; brickmould may overlap the finished wall beyond the structural opening.
| Boundary, from center outward | What to measure | What it answers |
|---|---|---|
| A: Door slab | Panel width, height, and thickness | Will a replacement slab fit the existing assembly? |
| B: Outside frame | Outside jamb-to-jamb width and complete unit height | How large is the assembled door unit? |
| C: Rough opening | Structural width and height, with framing identified | Can the unit fit with the specified installation clearance? |
| D: Outside brickmould | Exterior trim width and height | Will the trim cover the existing finish opening? |
Use a separate worksheet for each opening. Photograph the tape at difficult measurements and label the exterior side on your sketch; that avoids mixing measurements from two similar doors.
| Ordering field | Record before purchase |
|---|---|
| Existing slab | Top/middle/bottom widths; left/right heights; thickness |
| Opening condition | Both diagonals; jamb plumb; sill level; signs of rot |
| Replacement frame | Outside dimensions; jamb depth; threshold profile |
| Required rough opening | Manufacturer’s minimum dimensions and allowed tolerances |
| Exterior coverage | Brickmould outside dimensions; siding or masonry opening |
| Floor clearance | Finished floor height; sweep clearance; swing obstructions |
| Hardware preparation | Hinge dimensions and locations; bores; backset; strike locations |
| Configuration | Slab, assembled prehung, or knock-down; handing diagram; swing |
32 x 80 Versus 30 x 80 Exterior Doors
A 30 x 80 exterior door is nominally two inches narrower than a 32 x 80 exterior door, and the sizes aren’t direct substitutes in the same frame. Neither nominal size proves compliance with a required clear-opening width.
Two-Inch Nominal Width Difference
The two-inch difference equals 50.8 mm. That sounds small, but it changes furniture clearance, frame dimensions, and the surrounding trim work; keeping the same nominal height doesn’t make the assemblies interchangeable.
| Specification | 32 x 80 exterior door | 30 x 80 exterior door |
|---|---|---|
| Nominal width | 32 inches | 30 inches |
| Nominal height | 80 inches | 80 inches |
| Metric nominal width | 812.8 mm | 762 mm |
| Same-frame replacement | Requires matching actual dimensions and preparation | Requires matching actual dimensions and preparation |
| Guaranteed 32-inch clear passage | No | No |
Frame Changes and Structural Implications: Reducing width usually requires a suitable smaller frame and opening infill; increasing width may affect studs, the header, siding, or masonry. Don’t remove framing to gain two inches without checking the load path and permit requirements.
Nominal Width Versus Clear Opening: The panel occupies part of the passage when open. Stops, hinge geometry, and the assembly’s configuration also affect usable width, so a nominal 32-inch hinged door typically provides less than 32 inches of clear passage.
Egress Measurements at 90 Degrees
Measure clear width with the door open 90 degrees, between the door’s face and the opposite stop. Don’t measure between jambs with the door swung fully out of the way; that can overstate the opening available under the code measurement method.
Local Code and Door Role: The 2021 International Residential Code, Section R311.2 specifies at least 32 inches of clear width and 78 inches of clear height for the required egress door. Your adopted edition, amendments, existing-building provisions, and the door’s role control the actual requirement; other exterior doors aren’t automatically subject to that same provision.
Check the intended use before ordering a narrow entry for a dwelling, garage, or utility space. Our exit door guide provides related context, but the local building department must resolve project-specific compliance questions.
Assembly Type, Swing, and Hardware Compatibility
Choose a replacement slab only when the existing frame and hardware layout are compatible. Choose a prehung assembly or frame kit when the frame needs replacement, then confirm whether the components arrive assembled.
Slabs for Sound Existing Frames
A door slab is primarily the panel, without a complete installed frame. It may arrive bored, unbored, mortised, or unmortised. Retaining the frame makes sense only if its joints, sill, seals, and hinge attachment remain sound—not simply because it looks straight from across the room.
Prehung Units for Frame Replacement: A prehung door normally arrives hinged in its frame. It reduces the work of matching a new slab to an old jamb, but you still need the correct opening, jamb depth, swing, threshold, and exterior trim coverage.
Knock-Down Kits Require Assembly: A knock-down package contains components that must be assembled and aligned. “Frame included” doesn’t prove that the door is prehung. Review corner joints, sill connections, fasteners, and assembly instructions before comparing it with an assembled unit; our exterior door frame kit guide explains the distinction.
Thresholds, Weatherstripping, and Package Inclusions: Exterior packages often include a threshold and seals, but locksets, deadbolts, brickmould, sweeps, and installation supplies may be separate. Ask for an itemized parts list rather than interpreting “complete” as everything needed to finish the entry.
Handing and Swing Diagrams
Handing and swing are separate specifications. From an explicitly labeled exterior viewpoint, sketch the hinge edge and draw an arrow showing whether the panel opens indoors or outdoors. Then match that sketch to the seller’s diagram rather than relying on “left-hand” or “right-hand” alone.
- Mark which side of the sketch faces outdoors.
- Mark the hinge edge and latch edge.
- Draw the complete swing arc, including nearby walls and furniture.
- Check switch access, landing space, and possible storm-door interference.
- Have the supplier confirm the configuration against its own diagram.
Outswing Hardware and Weather Management: Buy an assembly intended for outswing use rather than reversing an inswing unit. Its sill and seals must manage exposure in that orientation, and exposed hinges need suitable security features. Check landing clearance and whether snow, debris, or another door could block operation.
Hinge Sizes, Locations, and Mortises: Record hinge count, leaf dimensions, corner radius, mortise depth, and positions from one consistent reference, such as the slab’s top edge. Matching the hinge count alone won’t prevent binding. A mortise cut too deep can pull the panel into the jamb and disturb the reveal.
Lock Bores, Backsets, and Strikes: Common residential preparations include a 2⅛-inch face bore, a 1-inch edge bore, and a 2⅜- or 2¾-inch backset. These are conventions, not guarantees. Measure from the door edge to the bore center, and check the latch and deadbolt heights against the existing strikes.
Choosing 32 x 80 Exterior Door Materials
Steel, fiberglass, and wood can all suit a 32 x 80 entry, but their maintenance needs and fitting limits differ. Pick the material for the exposure and assembly—not for an assumption that one material always insulates or secures better.
Steel: Insulation, Dents, and Corrosion
Many steel exterior doors have insulated cores and paintable skins. Their practical weaknesses include dents and corrosion where scratches expose the metal, especially around lower edges and hardware cutouts. Repair coating damage before rust spreads beneath the finish.
Use the coating system approved for the door rather than painting over chalky residue or rust. Our metal front door painting guide covers preparation; compare complete assembly ratings before assuming steel’s cold-to-the-touch surface means poor insulation.
Fiberglass: Finishes and Trimming Limits: Fiberglass avoids steel-skin rust and comes in smooth or woodgrain finishes, often over an insulated core. Its edges, internal blocking, and finishing requirements vary. Don’t assume you can plane it like solid wood; check allowed trimming by edge and dimension before purchase.
Compare the repair and maintenance trade-offs in our fiberglass versus steel guide. A woodgrain texture doesn’t prove a door accepts stain, and a factory color doesn’t automatically remove future coating requirements.
Wood: Construction and Moisture Exposure
Wood construction may mean solid lumber, engineered components, veneer, or a clad assembly. These behave differently under moisture exposure. The USDA Wood Handbook explains wood’s moisture-related dimensional changes; door construction and finish determine how those changes affect the entry.
Overhang, Finishing, and Warranty Requirements: Check required shelter, exposure limits, approved colors, and the treatment of all faces and edges. Strong afternoon sun, wind-driven rain, or trapped heat behind a storm door can affect performance. Follow the warranty’s installation and finishing schedule rather than treating primer as a finished weather barrier.
Security Depends on Complete Assemblies: A strong panel can’t compensate for a weak strike attachment, damaged jamb, unsuitable glazing, or poor anchorage. Select compatible reinforcement and fasteners according to the assembly instructions; longer screws alone don’t turn an untested door into a rated security system.
Glass, Privacy, and Energy Performance
Frosted glass obscures detail but doesn’t guarantee complete privacy, and Low-E glass doesn’t prove an energy certification. Compare the actual glass treatment and the complete door assembly’s documented ratings.
Clear Versus Frosted Glass
Clear glass provides views and daylight, but it also lets visitors see into the entry. Frosted, textured, or decorative glazing reduces recognizable detail. Check the treatment’s appearance from both sides rather than judging privacy from a brightly lit product photograph.
Frosted Glass and Visible Silhouettes: At night, a bright interior can make a person standing near frosted glass visible as a shadow. Test a sample with someone close to the pane and the exterior side dark. Move interior lighting or add an appropriate covering if that level of privacy isn’t enough.
Nine-Lite Grilles Versus Divided Lites: A “9-lite” appearance may come from a grille over or inside one glass unit, not nine separate glazed openings. Ask whether the grille is removable, internal, or permanently attached; that affects cleaning, replacement, and the way the door looks at close range.
Low-E Glass and Certification Limits
Low-E coatings influence radiant heat transfer and solar performance. The phrase alone doesn’t establish the door’s insulation value, air leakage, climate suitability, or ENERGY STAR status. Those claims need documentation for the configuration you’re buying.
Complete-Assembly U-Factor and SHGC: Lower U-factor means less heat transfer; lower solar heat gain coefficient means less admitted solar heat. Compare whole-door values rather than center-of-glass figures. A glass-heavy model and a solid model in the same series may carry different ratings.
NFRC and ENERGY STAR Verification: Request the NFRC label or certification record for the exact model and glass package, then compare it with the applicable ENERGY STAR windows, doors, and skylights criteria. A seller’s Low-E description isn’t a substitute for that match.
Door and Adjacent Safety Glazing: Verify that door glass meets the applicable safety-glazing requirements and carries the required identification. Nearby sidelights or windows may also fall under hazardous-location rules depending on their position and dimensions. Frosting, a grille, or a decorative pattern doesn’t itself establish safety compliance.
Exterior Door Prices and Total Project Costs
The total project cost includes more than the door: hardware, delivery, installation, finishing, repairs, disposal, and applicable fees all matter. No verified, dated retailer quotes were supplied for this article, so an unsupported dollar range would give a false sense of precision.
Like-for-Like Product Price Comparisons
Compare matching configurations: size, material, glass, swing, frame construction, finish, and certification. A bare slab and an assembled prehung door aren’t equivalent offers, even when both carry the same nominal dimensions.
Retailer Inventory and Local Availability: Check local stock and special-order options through manufacturer dealers and retailers such as The Home Depot, Lowe’s, or Menards. Search by the full configuration, not width alone; a stocked 32-inch slab may have the wrong hinge preparation or glass package.
Current Prices and Delivery Conditions: Save each dated quote with its SKU, delivery address, stock status, freight charge, and sale conditions. Ask whether delivery is curbside and inspect the damage-reporting policy. A heavy assembly arriving at the curb may require extra handling before installation can begin.
Included Components Versus Additional Purchases: Identify every excluded part before accepting the price. Locks, deadbolts, trim extensions, flashing, sealant, fasteners, and finish coatings can remain separate purchases even on a frame-included package.
Installation, Finishing, and Disposal Costs
Labor scope should state whether the installer removes the old unit, prepares the sill, installs flashing, fits trim, finishes the door, and disposes of debris. “Door installation” can describe very different amounts of work.
Rot, Resizing, and Opening Repairs: Ask how concealed damage will be priced after removal. Soft sill wood, deteriorated jamb bottoms, or loose framing can turn a simple replacement into a repair project. A written unit rate or approval process is more useful than a vague allowance.
Permits, Taxes, and Structural Work: Confirm applicable permit fees, tax, inspections, and any separate framing or masonry work. Keep structural alterations distinct from ordinary fitting adjustments so competing bids don’t hide different scopes behind one total.
Total-Cost Worksheet and Comparable Quotes: Add door, hardware, delivery, installation, finishing, opening repairs, disposal, permits, and taxes. Mark each item as included, excluded, or allowance-based, then compare written quotes using the same worksheet.
| Cost item | Quote detail to request |
|---|---|
| Door and assembly | Exact model, size, swing, glass, frame, and finish |
| Hardware and supplies | Locks, reinforcement, flashing, seals, fasteners, and trim |
| Delivery | Freight, unloading, handling, and damage procedures |
| Installation and finishing | Removal, sill preparation, fitting, trim, coating, and cleanup |
| Repairs and resizing | Defined allowance, unit rates, and approval process |
| Disposal and fees | Hauling, permits, inspections, and applicable taxes |
32 x 80 Exterior Door Product Examples
These product examples illustrate three buying needs: replacing a slab, buying frame components, and assembling a knock-down kit. Their descriptions are supplied listing claims, not independently verified specifications or comparative test results.
Privacy-Glass Replacement Slab
This fiberglass slab is relevant if you’re retaining a compatible frame and want obscured glazing. The supplied description states a 31¾ x 79-inch actual panel, four frosted lites, a primed woodgrain surface, pre-cut hinge mortises, and lock preparation.

Frosted Glass Fiberglass Door Slab
- Actual slab size is 31-3/4 x 79 inch
- Four frosted glass lites balance light and privacy
- Primed woodgrain fiberglass surface
- Pre-cut hinge mortises simplify fitting
- Pre-cut lockset hole supports hardware installation
 Buy on Amazon
Verify Actual Size and Preparation: Obtain a dimensioned drawing showing thickness, hinge locations, bore centers, and permitted trimming. The stated 79-inch height deserves close attention: don’t assume the threshold or sweep will compensate if your existing panel is taller.
Frame-Included Fiberglass Option: The next listing describes a right-hand inswing fiberglass door with four frosted lites, a white primed surface, a vinyl frame, and brickmould. It addresses buyers who need frame components rather than a panel alone.

White Fiberglass Door with Frosted Glass
- Built for 32 x 80 exterior openings
- Four frosted glass lites provide privacy
- Right-hand inswing configuration
- White primed fiberglass surface
- Includes vinyl frame and brickmould
Buy on Amazon
Verify Assembly and Opening Requirements: Ask whether this package ships assembled, partially assembled, or knock-down. Confirm outside-frame dimensions, required rough opening, jamb depth, threshold, seals, and the manufacturer’s handing diagram. “Built for 32 x 80 exterior openings” isn’t enough to establish fit.
Left-Hand Knock-Down Kit
This knock-down kit is listed with black woodgrain fiberglass, four frosted Low-E lites, a vinyl frame, brickmould, and left-hand inswing orientation. Treat assembly as part of the project scope, not as incidental unpacking.

Black Fiberglass Entry Door Kit
- Fits 32 x 80 exterior door applications
- Black woodgrain fiberglass creates a refined look
- Four frosted Low-E glass lites
- Vinyl frame and brickmould are included
- Left-hand inswing knock-down door kit
Buy on Amazon
Verify Ratings, Assembly, and Warranty: Request complete-assembly energy documentation, the assembly manual, required sealants and fasteners, and warranty terms. Check whether the black finish has sun-exposure restrictions and whether owner assembly affects coverage.
Listing Claims Versus Verified Specifications: Before buying any example, obtain the manufacturer’s model number and written confirmation of fit. Save the specification sheet, parts list, and warranty with the order. A listing badge or photograph can’t verify trimming limits, safety glazing, structural ratings, or package completeness.
Installation Problems and Prevention
Water leakage, binding, and drafts often come from installation details rather than the nominal door size. In practical fitting work, check drainage, frame alignment, seal contact, and latch operation before foam and trim conceal the assembly.
Sill-Pan Flashing and Drainage
A sill pan or approved equivalent manages water that reaches beneath the threshold. It must integrate with the surrounding wall and provide the intended drainage path; caulk alone isn’t a substitute. The Building America Solution Center pan-flashing guide explains the role of pan flashing at exterior openings.
Manufacturer-Approved Sealing and Flashing Integration: Follow the door’s specified bedding, corner sealing, fastening, and wall-flashing sequence. Don’t add a continuous bead across an intended drainage outlet. Coordinate the head flashing and weather-resistant barrier so water sheds outward rather than behind the jamb.
Binding, Shimming, and Uneven Gaps: Read the reveal—the visible gap around the panel—while checking plumb and alignment. A narrowing top gap or rubbing latch edge helps locate the problem, but don’t plane the slab before checking the frame. Shim at the specified support and fastening points without twisting the jamb.
Low-Expansion Foam and Jamb Distortion: Use window-and-door foam only where the instructions permit it, and apply it sparingly. Excess expansion can bow a jamb inward after the door initially works. Recheck the reveal and operation after the foam cures, not just immediately after fastening.
Threshold Alignment and Air Leakage: Check for consistent sweep contact without excessive drag. A cold streak across your ankles or a thin line of daylight near a lower corner points to a sealing problem, but it doesn’t identify the cause by itself. Check the threshold, corner pads, sweep, and frame alignment before adjusting anything.
Operation Checks Before Final Trim
Check operation with the latch and deadbolt installed before covering fasteners. The panel should move smoothly, the latch should engage without lifting or pulling hard, and the deadbolt should throw without forcing the door against the seals. Grinding, scraping, or a springy closing feel calls for inspection.
- Open and close the panel through its full travel.
- Check the reveal at both jambs and across the head.
- Test latch and deadbolt operation with normal hand pressure.
- Inspect weatherstrip contact and threshold clearance.
- Check fastening and flashing while they remain visible.
- Repeat the operation test after insulation cures and trim is fitted.
Use our exterior door installation guide to plan the sequence, then follow the selected unit’s instructions. Keep repair access open until the checks pass; removing finished trim to correct a bowed jamb adds avoidable work.
Slab Mismatches and Trimming Limits: Trimming won’t reliably solve misplaced hinge mortises, incompatible lock bores, or an unsuitable bottom-edge profile. Cutting beyond the allowed limit may remove blocking, damage the skin, interfere with the sweep, or void coverage. Confirm permission before cutting—not after the first test fit.
Correctable Issues Versus Replacement Needs: Modest alignment, strike, or threshold adjustments may be repairable when the instructions permit them. Wrong swing, incompatible preparation, excessive size mismatch, damaged structural components, or an unapproved exposure often call for another slab or a complete replacement assembly.
The safest ordering decision rests on documented dimensions, a confirmed assembly type, and a matching configuration. Resolve uncertainty before purchase: a nominally correct 32 x 80 exterior door can still be the wrong door for the opening.
FAQs
What Is The Rough Opening For A 32 X 80 Exterior Door?
A 32 x 80 exterior prehung door typically needs a rough opening about 34 inches wide by 82 1/2 inches high. This extra space allows room for the frame, shims, leveling, and insulation. Always check the manufacturer’s installation instructions, because jamb and threshold dimensions can vary slightly.
Is A 32 X 80 Exterior Door Actually 32 Inches Wide?
Yes, a 32 x 80 door slab is normally 32 inches wide and 80 inches tall. However, a prehung door unit is wider because it includes the jamb frame. Measure the actual door slab, frame, and available opening separately before ordering a replacement.
Can A 30 X 80 Exterior Door Replace A 32 X 80 Door?
A 30 x 80 exterior door can replace a 32 x 80 door only if you modify the opening or add properly sized framing. The smaller door will leave extra width that must be filled and finished securely. It also reduces passage space, which may affect accessibility and furniture movement.
Should I Buy An Exterior Door Slab Or A Prehung Door?
Buy a prehung exterior door when the existing frame is damaged, out of square, or being replaced. A door slab is a good option when the current jamb is sound and the new slab matches its size, hinge locations, and lock preparation. Prehung units are usually easier for beginners to weatherproof correctly.
Does A 32-Inch Exterior Door Provide 32 Inches Of Clear Opening?
No, a 32-inch exterior door usually provides less than 32 inches of clear opening. The door thickness, hinges, stop molding, and frame reduce the usable passage width, often to about 28 to 30 inches. Check the manufacturer’s clear-opening specification when accessibility clearance is important.
Disclosure: LuxyDoor is reader-supported. When you buy through links on our site, we may earn an affiliate commission at no extra cost to you. As an Amazon Associate we earn from qualifying purchases.

Abdelbarie Elkhaddar
Glamorwood Ltd.
A door expert and home improvement writer with over 12 years of experience. I help homeowners and contractors choose smart, stylish, and secure doors.
Bifold Barn Door Buying Guide: Sizes, Clearance, Hardware, and Tips
A bifold barn door can add barn-style character while saving space in closets, pantries, laundry rooms, bathrooms, and tight hallways. This guide explains how they work, how to measure correctly, what hardware you need, and what to check before buying.Modern Barn Door Buying Guide: Styles, Hardware, Sizing and Costs
Choosing a modern barn door means balancing style, privacy, hardware, sizing and installation needs. This guide compares materials, room fit, costs and product options so you can choose the right modern sliding barn door for your space.





Leave a Reply